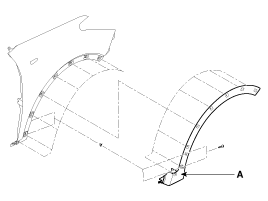
Replacement • Put on gloves to protect your hands. • When prying with a flat-tip screwdriver, wrap it with protective tape, and apply protective tape around the related parts, to prevent damage. • ...
Replacement • Put on gloves to protect your hands. • When prying with a flat-tip screwdriver, wrap it with protective tape, and apply protective tape around the related parts, to prevent damage. • ...
See also:
Fuel Filler Door Release Actuator. Repair procedures
Inspection 1. Remove the left luggage side trim. 2. Remove the subwoofer. 3. Remove the fuel filler housing after opening the fuel filler door. 4. Loosen the fuel filler actuator mounting bolts (2EA). ...
Intake Manifold. Repair procedures
Removal and Installation 1. Disconnect the battery negative terminal. 2. Remove the air cleaner assembly. 3. Disconnect the intake OCV (Oil control valve) connector (A). 4. Disconnect the VIS (Variable ...
Battery. Description and Operation
Description 1. The MF(Maintenance Free) battery is, as the name implies, totally maintenance free and has no removable battery cell caps. 2. The MF(Maintenance Free) battery does not require water replenishment ...

 Hyundai Santa Fe: Fender Garnish. Repair procedures

 Rear Spoiler. Repair procedures
 Quarter Garnish. Repair procedures