Replacement
[Console rear complete assembly]
| •
|
Put on gloves to protect your hands.
|
|
| •
|
When prying with a flat-tip screwdriver, wrap it with
protective tape, and apply protective tape around the related
parts, to prevent damage.
|
| •
|
Use a plastic panel removal tool to remove interior trim
pieces to protect from marring the surface.
|
| •
|
Take care not to bend or scratch the trim and panels.
|
|
|
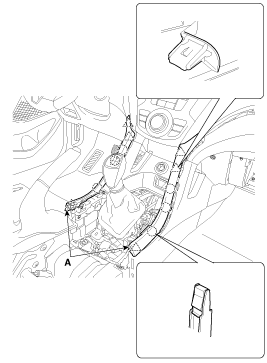
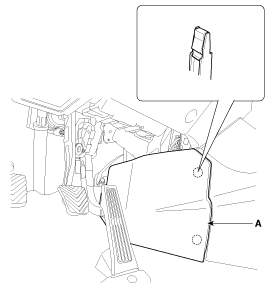
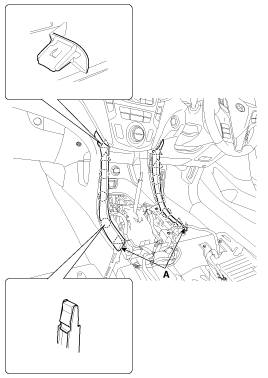
1. |
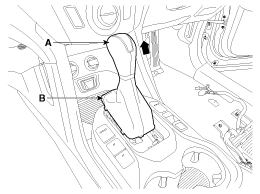
Disconnect the gear boots (A).
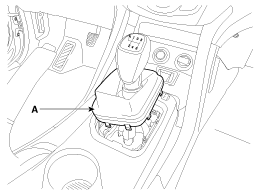
|
|
2. |
Using a screwdriver or remover, remove the console upper cover
(A).
|
|
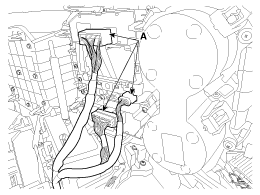
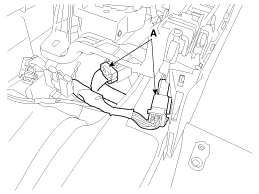
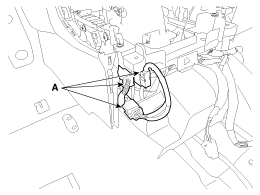
3. |
Disconnect the connector (A).
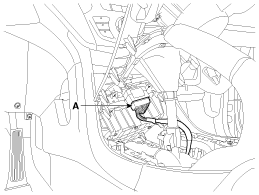
|
|
4. |
Remove the console armrest tray (A).
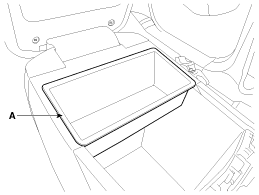
|
|
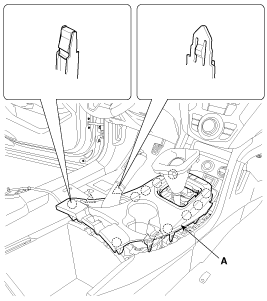
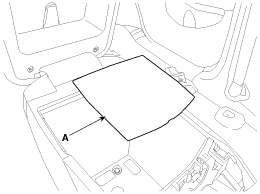
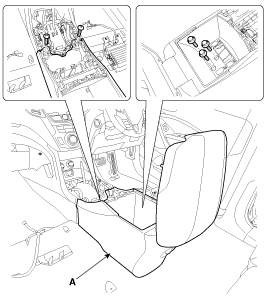
5. |
Remove the console tray met (A).
|
|
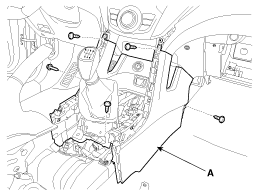
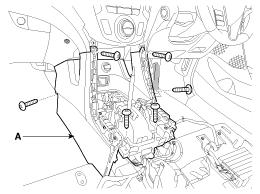
6. |
After loosening the mounting screws and bolts, then remove the
console rear complete assembly (A).
|
|
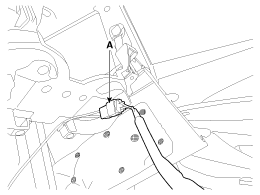
7. |
Disconnect the power outlet connector (A).
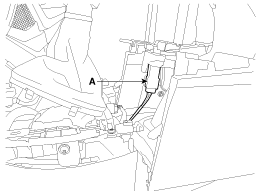
|
|
8. |
Install in the reverse order of removal.
|
• |
Make sure the connector is connected properly.
|
|
• |
Replace any damaged clips.
|
|
|
| •
|
Put on gloves to protect your hands.
|
|
| •
|
When prying with a flat-tip screwdriver, wrap it with
protective tape, and apply protective tape around the related
parts, to prevent damage.
|
| •
|
Use a plastic panel removal tool to remove interior trim
pieces to protect from marring the surface.
|
| •
|
Take care not to bend or scratch the trim and panels.
|
|
|
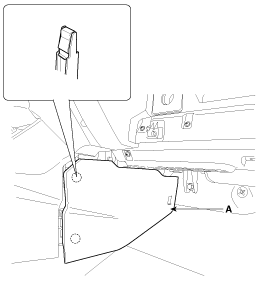
1. |
Remove the gear boots (B) and gear knob (A).
|
|
2. |
Using a screwdriver or remover, remove the console upper cover
(A).

|
|
3. |
Disconnect the connectors (A).
|
|
4. |
Remove the console armrest tray (A).
|
|
5. |
Remove the console tray met (A).
|
|
6. |
After loosening the mounting screws and bolts, then remove the
console rear complete assembly (A).
|
|
7. |
Disconnect the power outlet connector (A).
|
|
8. |
Install in the reverse order of removal.
|
• |
Make sure the connector is connected properly.
|
|
• |
Replace any damaged clips.
|
|
|
[Console front complete assembly]
| •
|
Put on gloves to protect your hands.
|
|
| •
|
When prying with a flat-tip screwdriver, wrap it with
protective tape, and apply protective tape around the related
parts, to prevent damage.
|
| •
|
Use a plastic panel removal tool to remove interior trim
pieces to protect from marring the surface.
|
| •
|
Take care not to bend or scratch the trim and panels.
|
|
|
1. |
Remove the console rear complete assembly.
|
|
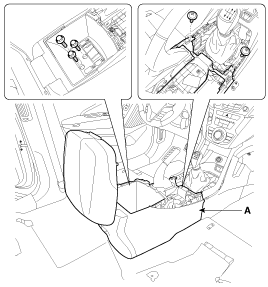
2. |
Using a screwdriver or remover, remove the front console garnish
(A).
|
|
3. |
Using a screwdriver or remover, remove the console side cover
(A).
[LH]
[RH]
|
|
4. |
Disconnect the connectors (A).
|
|
5. |
After loosening the mounting screws, then remove the console front
complete assembly (A).
|
|
6. |
Install in the reverse order of removal.
|
• |
Make sure the connector is connected properly.
|
|
• |
Replace any damaged clips.
|
|
|
| •
|
Put on gloves to protect your hands.
|
|
| •
|
When prying with a flat-tip screwdriver, wrap it with
protective tape, and apply protective tape around the related
parts, to prevent damage.
|
| •
|
Use a plastic panel removal tool to remove interior trim
pieces to protect from marring the surface.
|
| •
|
Take care not to bend or scratch the trim and panels.
|
|
|
1. |
Remove the console rear complete assembly.
|
|
2. |
Using a screwdriver or remover, remove the front console garnish
(A).
|
|
3. |
Using a screwdriver or remover, remove the console side cover
(A).
[LH]
[RH]
|
|
4. |
Disconnect the connectors (A).
|
|
5. |
After loosening the mounting screws, then remove the console front
complete assembly (A).
|
|
6. |
Install in the reverse order of removal.
|
• |
Make sure the connector is connected properly.
|
|
• |
Replace any damaged clips.
|
|
|
Component Location [Console rear complete assembly] 1. Console rear complete assembly [Console front complete assembly] 1. Console front complete assembly ...
Component Location 1. Rear console cover ...
See also:
Repair procedures
Adjustment 1. After loosening the hinge (A) mounting bolt, adjust the hood (B) by moving it up or down, or right or left. 2. Adjust the hood height by turning the hood overslam bumpers (C). 3. After loosening ...
Air conditioning
Press the A/C button to turn the air conditioning system on (indicator light will illuminate). Press the button again to turn the air conditioning system off. ...
Rear Door Belt Inside Weatherstrip. Repair procedures
Replacement 1. Remove the rear door trim. 2. Remove the rear door belt inside weatherstrip (A). 3. Install in the reverse order of removal. • Replace any damaged clips. ...
 Hyundai Santa Fe: Floor Console Assembly. Repair procedures
 Floor Console Assembly. Components and Components Location
 Rear Console Cover. Components and Components Location