Replacement • When removing and installing the hood lifter, an assistant is necessary. • When removing the clips, use a clip remover. 1. Using a screwdriver, lift the socket clips (A) up slightly on ...
See also:
Automatic-dimming function
Your mirror will automatically dim upon detecting glare from the vehicles traveling behind you. The autodimming function can be controlled by the Dimming ON/OFF Button: 1. Pressing and hold the button ...
Cooling Fan. Specifications
Specification Fuction Specification Maximum Drive Capability 250 W 21.0 + 10% A Input Signal Frequency 300 ± 5% Duty 10, 30 ~ 90 % Voltage level HI 0.7 V above LOW 0 ~ 1.9 V ...
Front Seat Shield Inner Cover. Repair procedures
Replacement • Put on gloves to protect your hands. • When prying with a flat-tip screwdriver, wrap it with protective tape, and apply protective tape around the related parts, to prevent damage. • ...
 Hyundai Santa Fe: Hood Assembly. Repair procedures
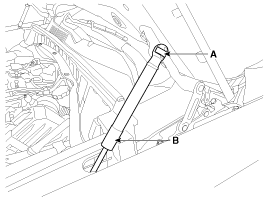
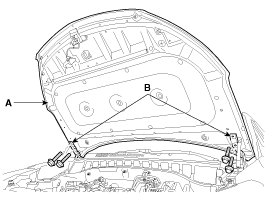
 Hood Assembly. Components and Components Location
 Hood Lift. Repair procedures