 Hyundai Santa Fe: Rear Seat Assembly. Repair procedures
Replacement
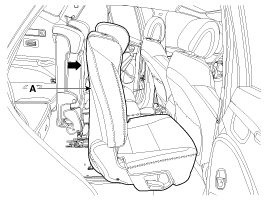
[Second row seat assembly]
| 1. |
Push the second row seat assembly [RH] (A) towards the front of
the vehicle as far as possible.
|
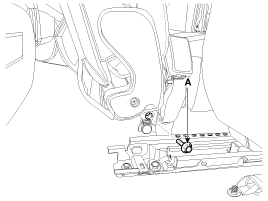
| 2. |
Loosen the second center seat belt buckle mounting bolt (A).
|
| 3. |
Push the second row seat assembly towards the front of the vehicle
as far as possible.
|
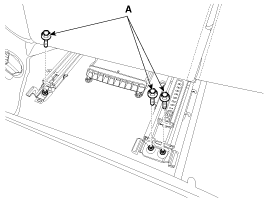
| 4. |
Loosen the second row seat assembly rear mounting bolts (A).
[LH]
[RH]
|

| 5. |
Push the second row seat assembly towards the rear of the vehicle
as far as possible.
|
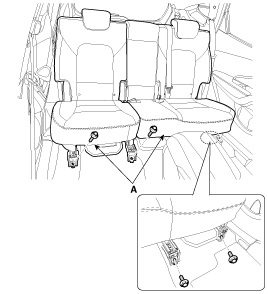
| 6. |
After loosening the mounting bolts, then remove the second row
seat assembly (A).
|
| 7. |
Install in the reverse order of removal.
|
[Third row seat assembly]
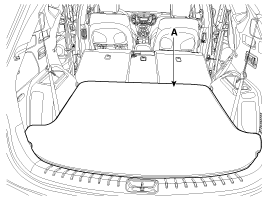
| 1. |
Remove the luggage covering met (A).
|
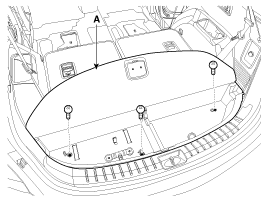
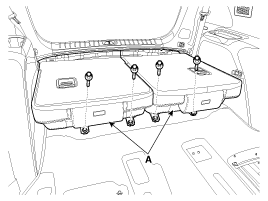
| 2. |
After loosening the mounting screws, then remove the luggage floor
box (A).
|
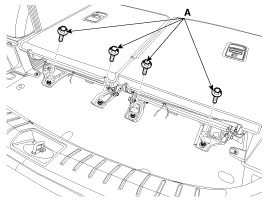
| 3. |
Loosen the third row seat assembly rear mounting bolts (A).
|
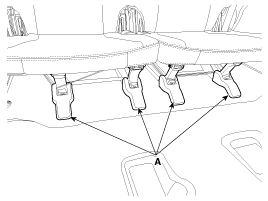
| 4. |
Remove the third row seat track mounting cover (A).
|
| 5. |
After loosening the mounting bolts, then remove the third row
seat assembly (A).
|
| 6. |
Install in the reverse order of removal.
|
 Rear Seat Assembly. Components and Components Location
Component Location [Second row seat assembly] 1. Second row seat assembly [LH] 2. Second row seat assembly [RH] [Third row seat assembly] 1. Third row seat assembly [LH] 2. Third row seat assembly [RH] ...
 Rear Seat Back Cover. Components and Components Location
Component Location [Second row seat assembly] 1. Rear seat back cover [LH] 2. Rear seat back cover [RH] [Third row seat assembly] 1. Rear seat back cover [LH] 2. Rear seat back cover [RH] ...
See also:
Rail Pressure Sensor (RPS). Troubleshooting
Signal Waveform ...
Front Pillar Trim. Repair procedures
Replacement • Put on gloves to protect your hands. • When prying with a flat-tip screwdriver, wrap it with protective tape, and apply protective tape around the related parts, to prevent damage. • ...
Description and Operation
Description The charging system included a battery, an alternator with a built-in regulator, and the charging indicator light and wire. The Alternator has eight built-in diodes, each rectifying AC current ...
