 Hyundai Santa Fe (TM): Lift and Support Points
| Lift and Support Points |
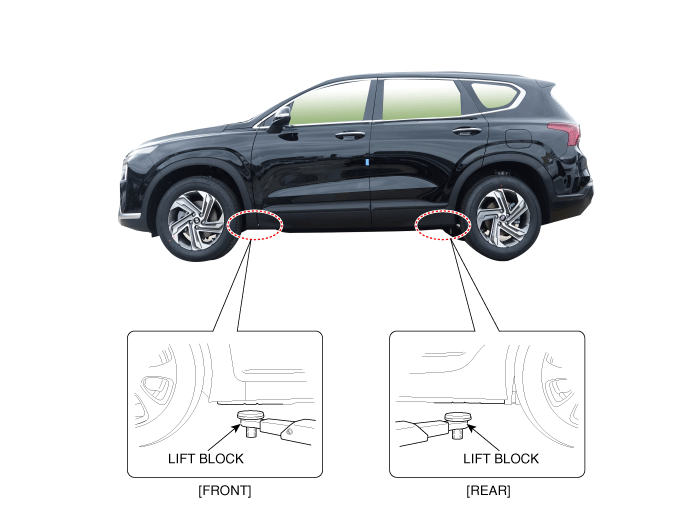
| 1. | Place the lift blocks under the support points as shown in the illustration. |
| 2. |
Raise the hoist a little and visually check that the lift block is properly seated on the vehicle support point.
|

| 3. | Raise the hoist to full height to inspect the lift points for secure support. |

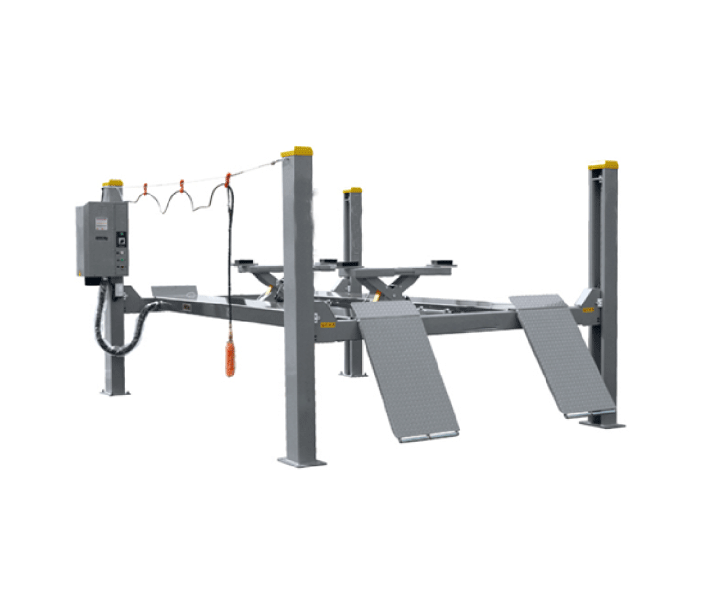
| 1. | Position the lift aligned with the side seal of the vehicle bottom. |
| 2. |
Raise the hoist to full height to check whether the vehicle is firmly supported.
|
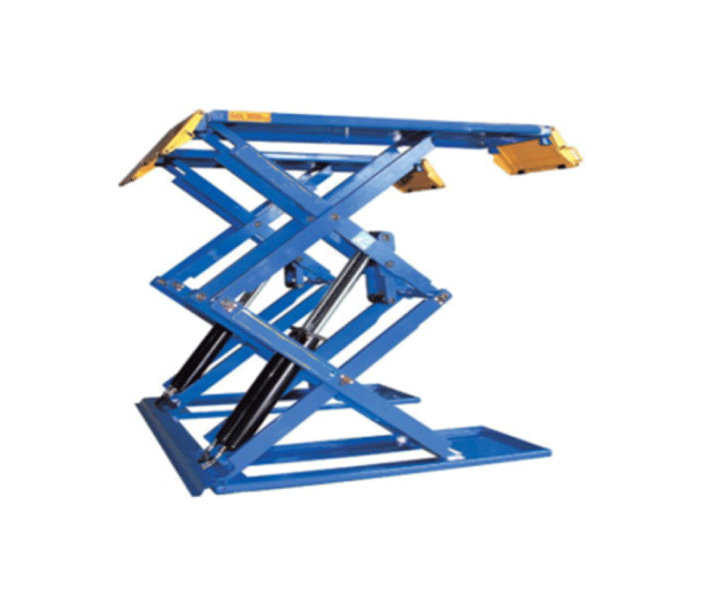
| 1. | Place the vehicle on the lower side of the lift body. |
| 2. |
After placing the wooden supports or rubber supports by matching them with the support points, slightly lift up the vehicle and check whether they are properly seated on the support points with naked eyes.
|
| 3. | Pay special attention to the fuel system as fuel can leak when parts are damaged. |
 Warning and Caution Labels
Warning and Caution Labels 1. Radiator cap caution 2. Fan caution 3. Battery caution Battery Caution Label Warning / Caution Label (Cont'd) A. Keep lighted cigarettes and all other flames or sparks ...
 Towing
Towing If the vehicle needs to be towed, call a professional towing service. Never tow vehicle with just a rope or chain. It is very dangerous. [Front] [Rear] Emergency Towing There are three popular ...
See also:
Timing Chain. Repair procedures
Removal 1. Remove the cylinder head cover. 2. Turn the crankshaft pulley and align its groove with the timing mark of the timing chain cover to set the piston of No.1 cylinder to the top dead center on ...
Automatic Transaxle. Components and Components Location
Components Location 1. Automatic transaxle 2. Shift cable bracket 3. Inhibitor switch connector 4. Manual control lever 5. Automatic transaxle mounting support bracket 6. Solenoid valve connector 7. ATF ...
Panorama Sunroof Switch. Repair
procedures
Inspection 1. Disconnect the negative (-) battery terminal. 2. Open the sunglass case cover from the overhead console then remove the 2 screws holding the overhead console. Disconnect the switch connector ...
