 Hyundai Santa Fe (DM): Roof Rack. Repair procedures
Replacement
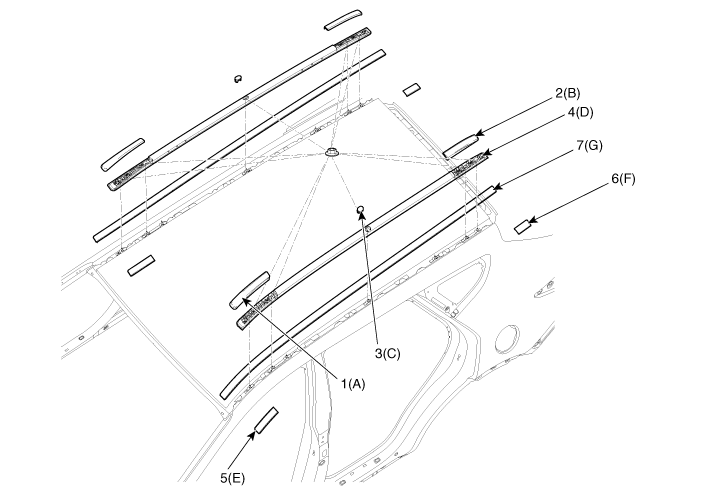
[General Type]
|
|
| 1. |
Remove the roof rack front cover (A) and roof rack rear cover
(B).
|
| 2. |
Remove the roof rack center cover (C).
|
| 3. |
After loosening the mounting nuts, then remove the roof rack assembly
(D).
|
| 4. |
Remove the roof front moulding (E) and roof rear moulding (F).
|
| 5. |
Using a screwdriver or remover, remove the roof moulding (G).
|
| 6. |
Install in the reverse order of removal.
|
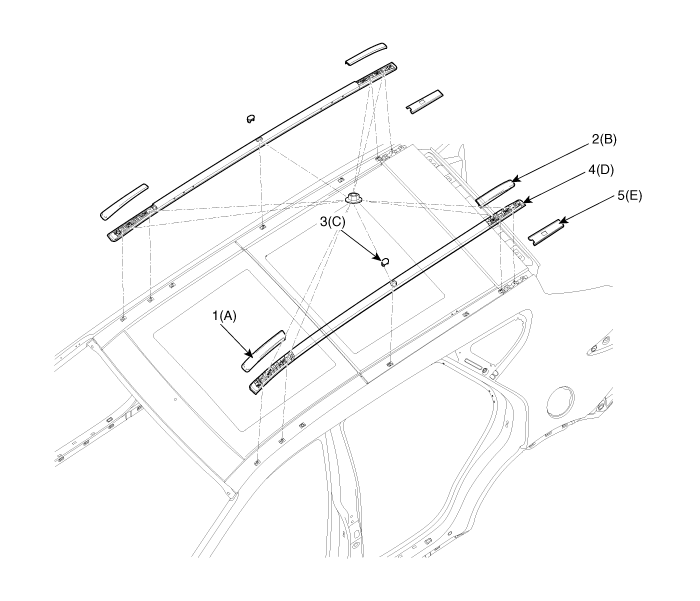
[Panorama sunroof Type]
|
|
| 1. |
Remove the roof rack front cover (A) and roof rack rear cover
(B).
|
| 2. |
Remove the roof rack center cover (C).
|
| 3. |
After loosening the mounting nuts, then remove the roof rack assembly
(D).
|
| 4. |
Using a screwdriver or remover, remove the roof moulding (E).
|
| 5. |
Install in the reverse order of removal.
|

 Delta Garnish. Repair procedures
Replacement • Put on gloves to protect your hands. • When prying with a flat-tip screwdriver, wrap it with protective tape, and apply protective tape around the related parts, to prevent damage. • ...
See also:
Repair procedures
Inspection Check it by the procedure below to see if the function of the ECM is normal. 1. Turn the ignition key to the "ON" position. 2. Cover the forward facing sensor. 3. Head a light to the ...
35R Clutch Control Solenoid Valve(35R/C_VFS). Schematic Diagrams
Circuit Diagram ...
Rear Seat Latch. Repair procedures
Replacement [Second row seat assembly] • Put on gloves to protect your hands. • When prying with a flat-tip screwdriver, wrap it with protective tape, and apply protective tape around the related parts, ...
