 Hyundai Santa Fe: Telemetics Unit (TMU). Repair procedures
Removal
| 1. |
Disconnect the negative (-) battery terminal.
|
| 2. |
Remove the glove box housing.
|
| 3. |
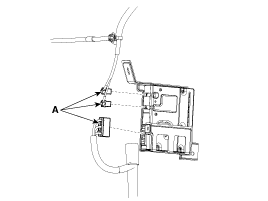
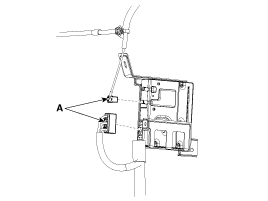
Disconnect the cables and connector (A) from the
MTS unit.
[Audio type]
[AVN type]
|
| 4. |
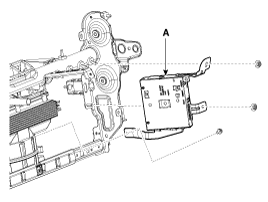
Remove the MTS unit after loosening the nuts(2EA)
and a bolt.
|
Installation
| 1. |
Connect the connector and cables.
|
| 2. |
Install the MTS unit.
|
| 3. |
Install the glove box housing.
|
| 4. |
Connect the negative (-) battery terminal.
|
Inspection
| 1. |
After replacing the TMU, connect to "call center"
by pushing the Blue Link button.
|
| 2. |
If Blue Link service connected successfully, and
then technician can hear the "Welcome to Hyundai Bluelink" sound.
|
 Telemetics Unit (TMU). Components and
Components Location
Component Connector Pin Information [Audio type] No. Description No. Description 1 Ground 17 - 2 Ground 18 Battery 1 3 - 19 IGN 1 4 Keypad ground 20 ACC 5 MIC output - 21 Airbag 6 MIC output + 22 Keypad ...
 BlueLink Control Switch. Components and
Components Location
Components ...
See also:
Components and Components Location
Component Location 1. Driver power window main switch 2. Passenger window switch 3. IPM (Intalligent intergrated Platform Module) 4. Door lock switch 5. Tailgate lock actuator & switch 6. Front door ...
For best battery service
Keep the battery securely mounted. Keep the battery top clean and dry. Keep the terminals and connections clean, tight, and coated with petroleum jelly or terminal grease. Rinse any spilled electrolyte ...
Hitches
It's important to have the correct hitch equipment. Crosswinds, large trucks going by, and rough roads are a few reasons why you’ll need the right hitch. Here are some rules to follow: Do you have ...


