 Hyundai Santa Fe: Side Body. Body Repair
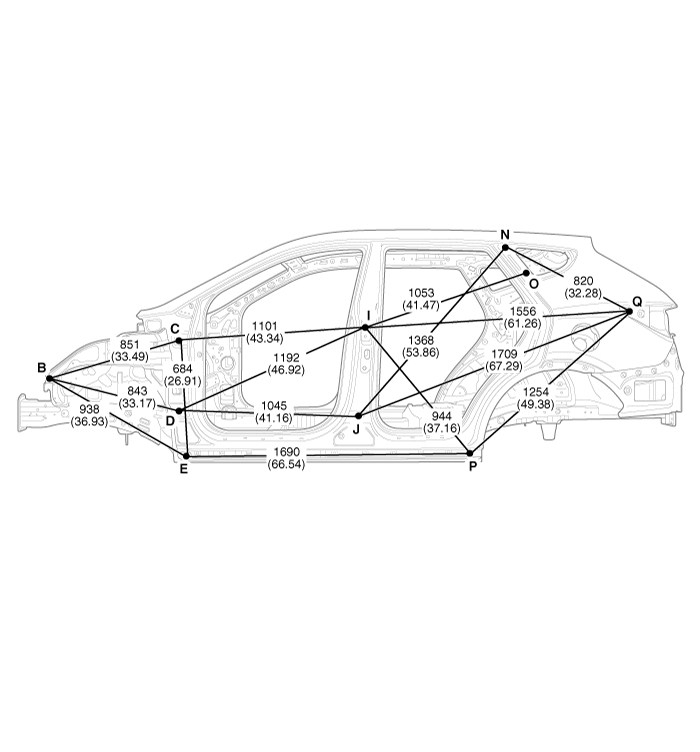
Side Body A
|
* These dimensions indicated in this figure are actual-measurement
dimensions. [ Unit : mm (inch) ] |
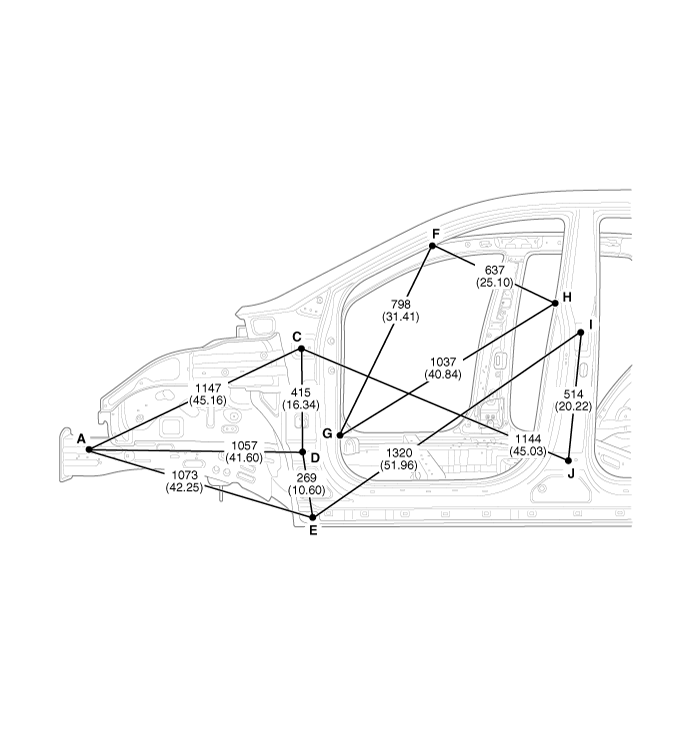
Side Body B
|
* These dimensions indicated in this figure are actual-measurement
dimensions. [ Unit : mm (inch) ] |
Side Body C

|
* These dimensions indicated in this figure are actual-measurement
dimensions. [ Unit : mm (inch) ] |
|
|
|
|
|
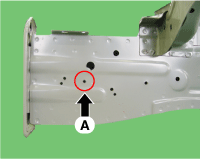
Front side member tooling hole (Ø6.6) |
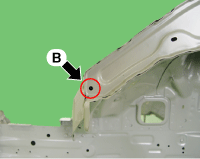
Fender apron upper panel tooling hole (Ø8) |
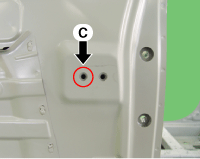
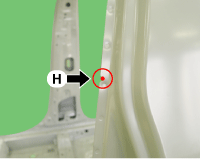
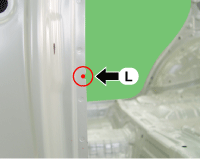
Front door upper hinge mounting hole (Ø13) |
|
|
|
|
|
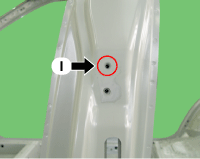
Front door lower hinge mounting hole (Ø13) |
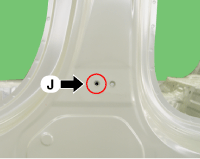
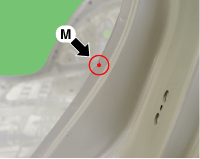
Fender panel mounting hole (Ø6.6) |
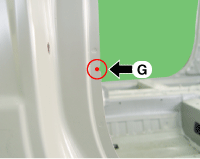
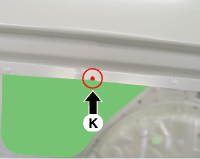
Side outer panel notch |
|
|
|
|
|
Side outer panel notch |
Side outer panel notch |
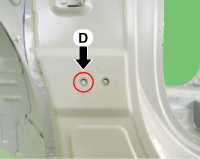
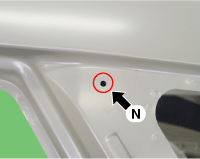
Rear door upper hinge mounting hole (Ø13) |
|
|
|
|
|
Rear door lower hinge mounting hole (Ø13) |
Side outer panel notch |
Side outer panel notch |

|
|
|
|
|
Side outer panel notch |
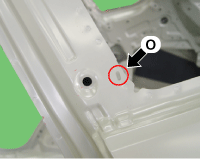
Quarter fixed garnish mounting hole (Ø6.4) |
Quarter fixed garnish mounting hole (5X12) |
|
|
|
|
|
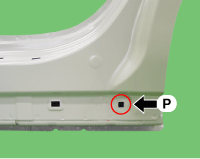
Side sill molding mounting hole (10X10) |
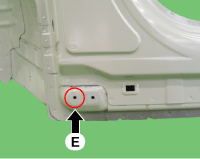
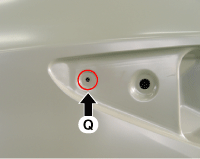
Rear combination lamp housing mounting hole (Ø6) |
|
 Front Body. Body Repair
Front Body A * These dimensions indicated in this figure are actual-measurement dimensions. [ Unit : mm (inch) ] Front Body B * These dimensions indicated in this figure are actual-measurement dimensions. ...
 Interior. Body Repair
Interior A * These dimensions indicated in this figure are actual-measurement dimensions. [ Unit : mm (inch) ] Interior B * These dimensions indicated in this figure are actual-measurement dimensions. ...
See also:
Alternator. Components and Components Location
Components 1. OAD (Overrunning Alternator Decoupler) 2. Front bracket 3. Front bearing 4. Rotor 5. Rear bearing 6. Rear bracket 7. Through bolt 8. Regulator assembly 9. Regulator bolt 10. Rear cover ...
Non-operational conditions of rear parking assist system
The rear parking assist system may not operate properly when: 1. Moisture is frozen to the sensor. (It will operate normally when the moisture has been cleared.) 2. The sensor is covered with foreign matter, ...
Schematic Diagrams
Circuit Diagram ...
