 Hyundai Santa Fe (TM): Cooling System
Coolant. Repair procedures
| Refilling And Bleeding |
|
|
|
| 1. |
Make sure the engine and radiator are cool to the touch.
|
| 2. |
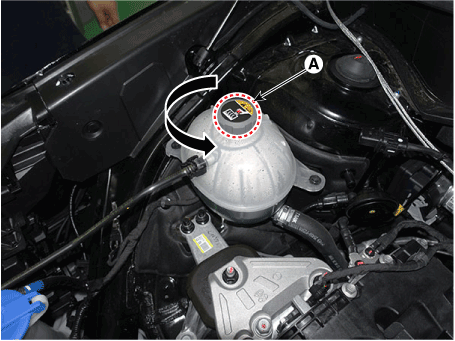
Remove reservoir tank cap (A).
|
| 3. |
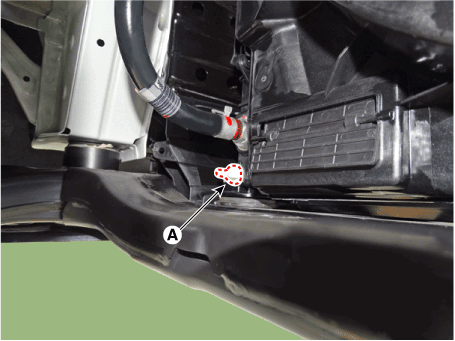
Loosen the drain plug (A), and drain the coolant.
|
| 4. |
Tighten the radiator drain plug securely.
|
| 5. |
After draining engine coolant in the reservoir tank, clean the tank.
|
| 6. |
Fill the radiator with water through the reservoir tank cap and tighten
the cap.
|
| 7. |
Start the engine and allow to come to normal operating temperature.
Wait for the cooling fans to turn on several times. Accelerate the engine
to aid in purging trapped air. Shut engine off.
|
| 8. |
Wait until the engine is cool.
|
| 9. |
Repeat steps 1 to 8 until the drained water runs clear.
|
| 10. |
Fill fluid mixture with coolant and water(5:5) (Tropical region – 4:6)
slowly through the radiator cap. Push the upper/lower hoses of the radiator
so as bleed air easily.
|
| 11. |
Start the engine and run until coolant circulates.
When the cooling fan operates and coolant circulates, refill coolant
through the radiator cap.
|
| 12. |
Repeat 11 until the cooling fan 3-5 times and bleed air sufficiently
out of the cooling system.
|
| 13. |
Install the radiator cap and fill the reservoir tank to the "MAX (or
F)" line with coolant.
|
| 14. |
Run the vehicle under idle until the cooling fan operates 2-3 times.
|
| 15. |
Stop the engine and wait coolant gets cool.
|
| 16. |
Repeat 10 to 15 until the coolant level doesn't fall any more, bleed
air out of the cooling system.
|
Radiator. Repair procedures
| Removal and Installation |
|
| 1. |
Remove the cooling fan.
(Refer to Cooling System - "Cooling Fan")
|
| 2. |
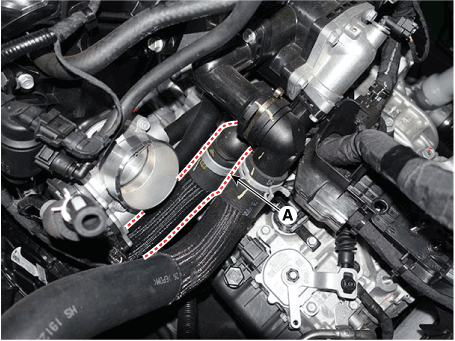
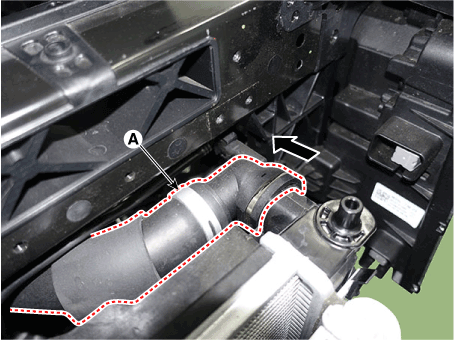
Disconnect the radiator lower hose (A) from inlet fitting.
|
| 3. |
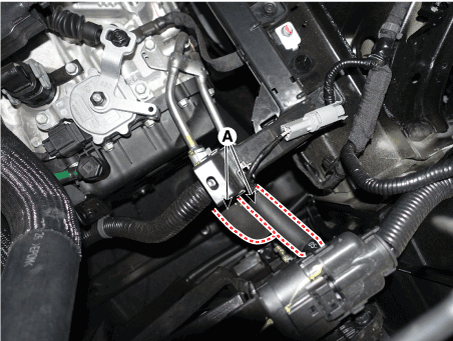
Disconnect the ATF cooler hoses (A).
|
| 4. |
Pull the raditor upward and remove it from engine room.
|
| 5. |
Install in the reverse order of removal.
|
| 6. |
Fill the radiator with coolant and check for leaks.
|
Cooling Fan. Repair procedures
| Removal and Installation |
|
| 1. |
Disconnect the battery negative terminal.
|
| 2. |
Remove the air cleaner assembly.
(Refer to Intake and Exhasut System - "Air Cleaner")
|
| 3. |
Remove the front bumper cover.
(Refer to Body (Interior and Exterior) - "Front Bumper Cover")
|
| 4. |
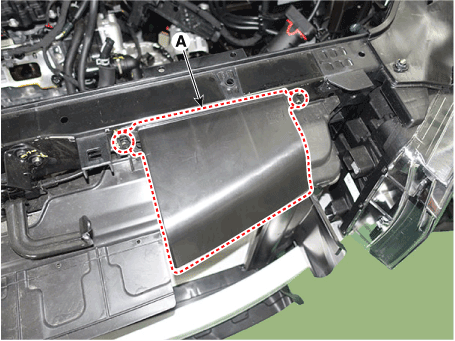
Remove the air intake shield (A).
|
| 5. |
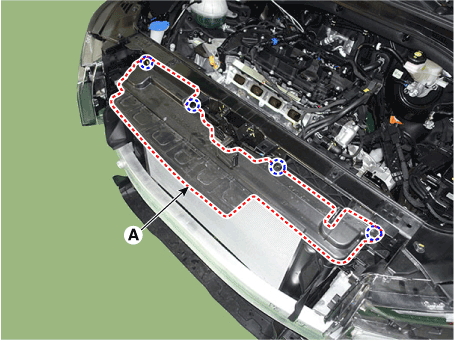
Remove the radiator upper air guard (A).
|
| 6. |
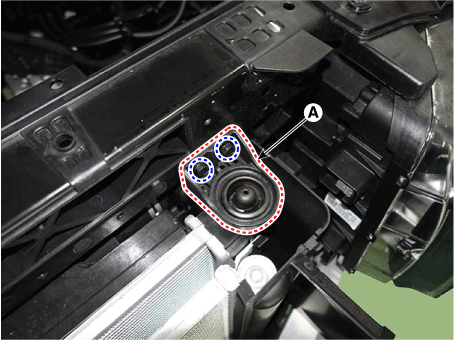
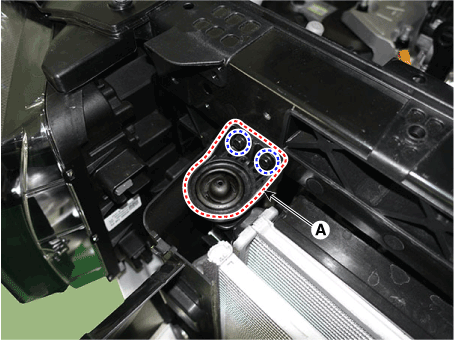
Remove the radiator mounting bracket (A).
[LH]
[RH]
|
| 7. |
Remove the front bumper beam assembly.
(Refer to Body (Interior and Exterior) - "Front Bumper Beam Assembly")
|
| 8. |
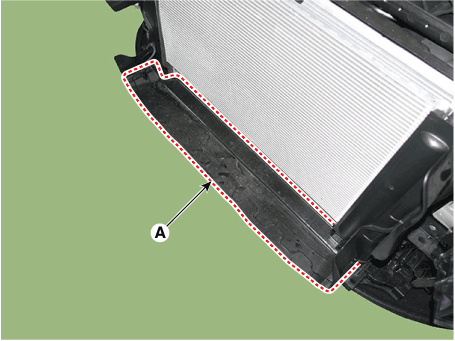
Remove the air dam (A).
|
| 9. |
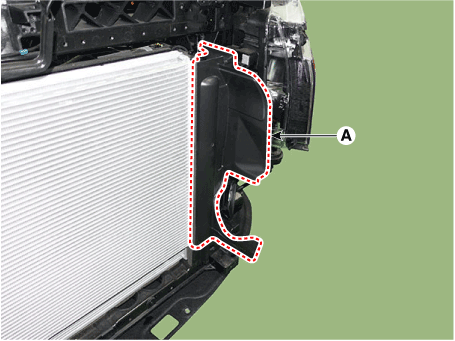
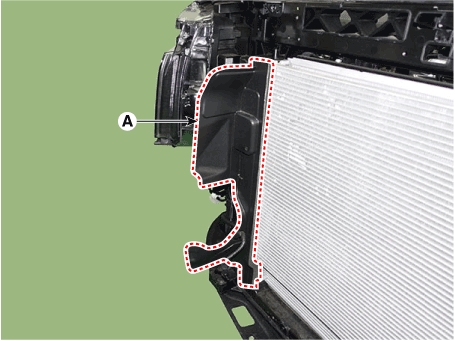
Remove the radiator side air guard (A).
[LH]
[RH]
|
| 10. |
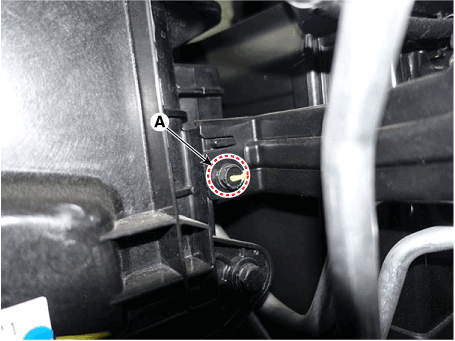
Loosen the A/C pipe bracket mounting bolt (A).
|
| 11. |
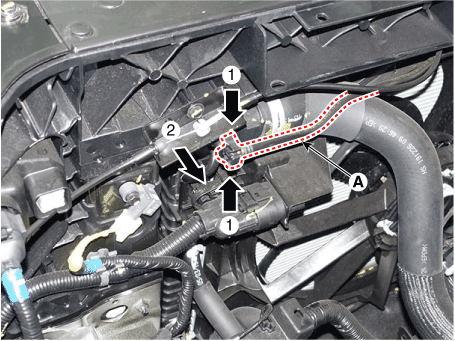
Disconnect the radiator upper hose (A) and degassing hose (B) from radiator.
|
| 12. |
Separate the condenser from the radiator.
|
| 13. |
Disconnect the cooling fan from radiator.
|
| 14. |
Install in the reverse order of removal.
|
| Disassembly |
| 1. |
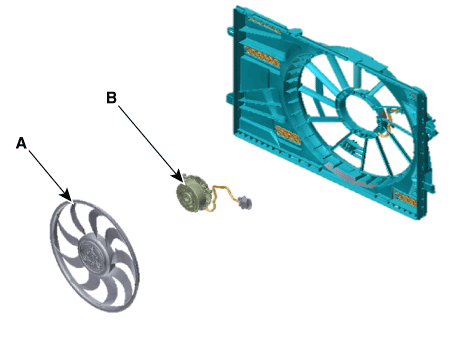
Remove the cooling fan (A) and then remove the cooling fan motor (B)
from the cooling fan assembly.
|
| 2. |
Install in the reverse order of removal.
|
| Inspection |
| 1. |
Turn ignition switch "OFF" and connect the diagnostic tool to the Data
Link Connector.
|
| 2. |
With the gear shift in P (Park) position and ignistion switch "ON" (LED
of the Power button illuminates in Red), select the "force drive" function.
|
| 3. |
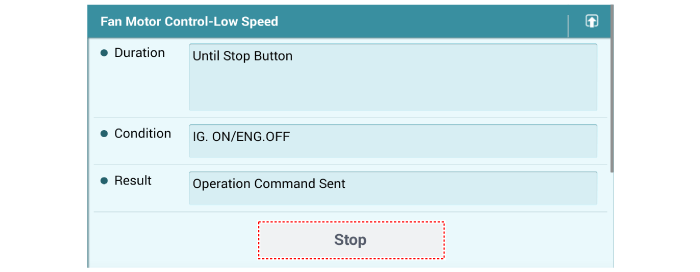
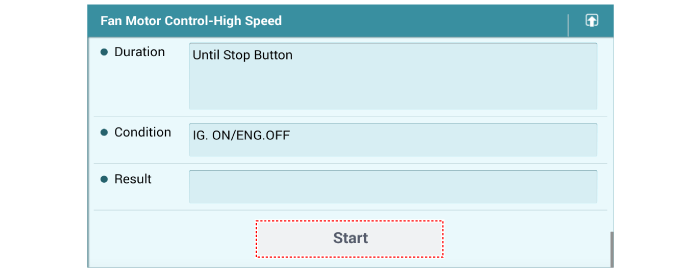
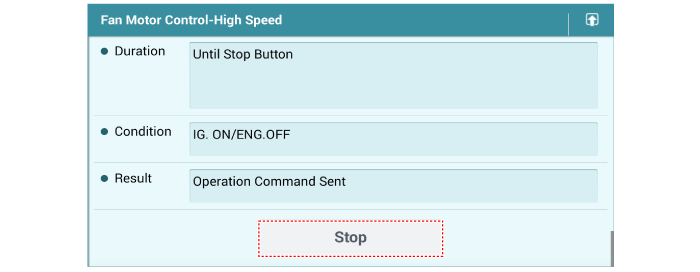
Force drive the cooling fan motor.
[Fan motor low speed]
[Fan motor high speed]
|
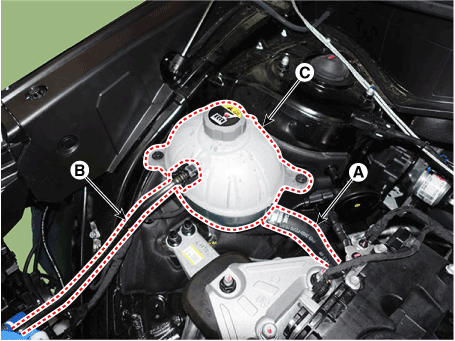
Reservoir Tank. Repair procedures
| Removal and Installation |
| 1. |
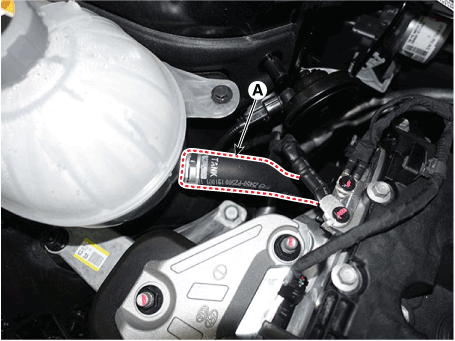
Remove the reservoir tank.
|
| 2. |
Install in the reverse order of removal.
|
Water Temperature Control Assembly. Repair procedures
| Removal and Installation |
|
| 1. |
Disconnect the battery negative terminal.
|
| 2. |
Remove the engine room under cover.
(Refer to Engine and Transaxle Assembly - "Engine Room Under Cover")
|
| 3. |
Drain the coolant.
(Refer to Cooling System - "Coolant")
|
| 4. |
Remove the air duct and air cleaner assembly.
(Refer to Intake and Exhaust System - "Air Cleaner")
|
| 5. |
Remove the battery.
(Refer to Engine Electrical System - "Battery")
|
| 6. |
Remove the battery tray.
(Refer to Engine Electrical System - "Battery")
|
| 7. |
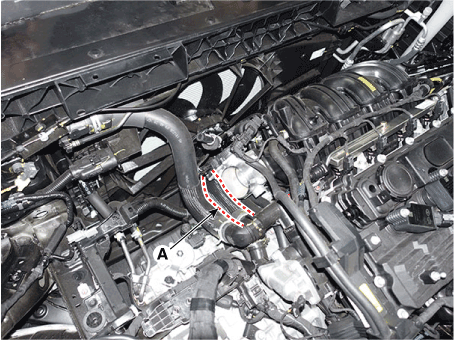
Disconnect the radiator upper hose (A).
|
| 8. |
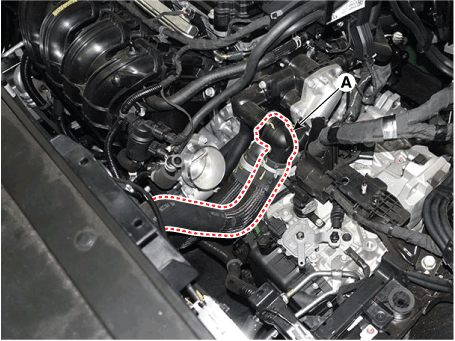
Disconnect the radiator lower hose (A).
|
| 9. |
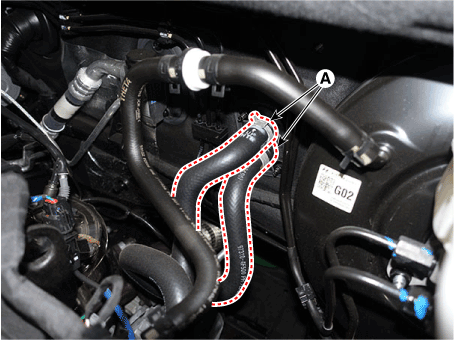
Disconnect the heater hoses (A).
|
| 10. |
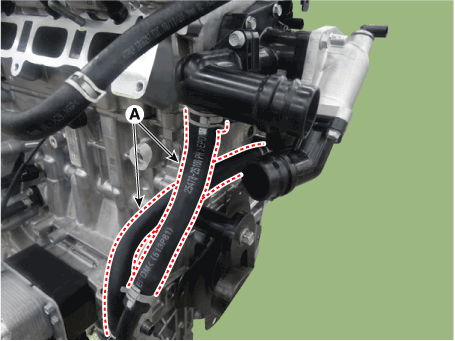
Disconnect the oil cooler hoses (A).
|
| 11. |
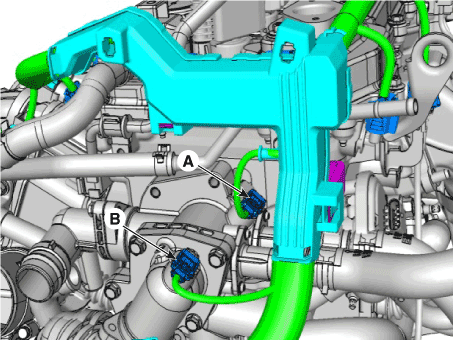
Disconnect the engine coolant temperature sensor connector (ECTS) (A)
and electric thermostat connector (B).
|
| 12. |
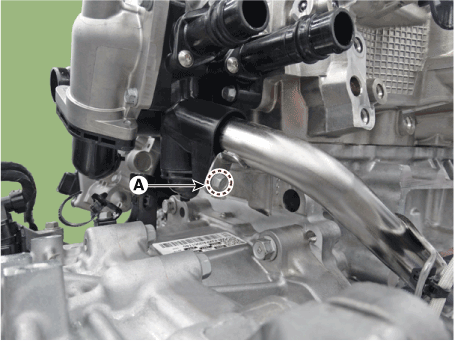
Remove the water pipe mounting bolt (A).
|
| 13. |
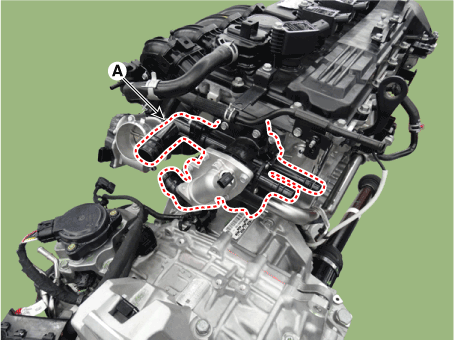
Remove the water temperature control assembly (A).
|
| 14. |
Install in the reverse order of removal.
|
| 15. |
Fill with engine coolant.
(Refer to Cooling System - "Coolant")
|
| 16. |
Start engine and check for leaks.
|
Water pump. Repair procedures
| Removal and Installation |
|
| 1. |
Disconnect the battery negative terminal.
|
| 2. |
Drain the coolant.
(Refer to Cooling System - "Coolant")
|
| 3. |
Remove the water pump belt.
(Refer to Timing System - "Drive Belt")
|
| 4. |
Disconnect the water hose (A).
|
| 5. |
Remove the exhaust manifold.
(Refer to Intake And Exhaust System - "Exhaust Manifold")
|
| 6. |
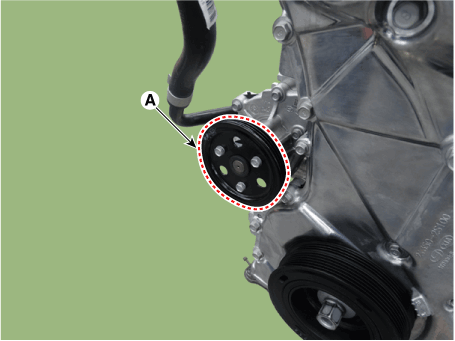
Remove the water pump pulley (A).
|
| 7. |
Remove the water temperature control assembly.
(Refer to Cooling System - "Water Temperature Control Assembly")
|
| 8. |
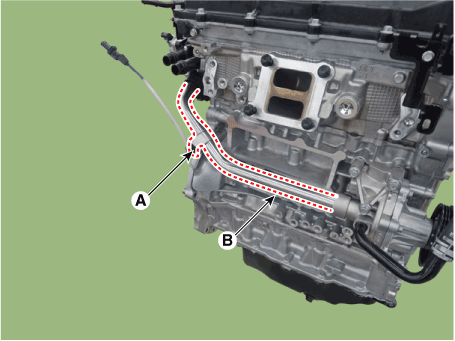
Remove the water pipe.
|
| 9. |
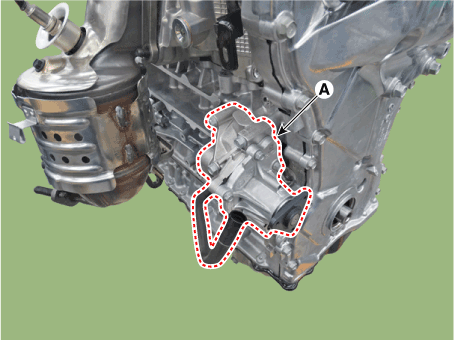
Remove the water pump (A) with gasket.
|
| 10. |
Install in the reverse order of removal.
|
| 11. |
Fill with engine coolant.
(Refer to Cooling System - "Coolant")
|
| 12. |
Start the engine and check for leaks.
|
| 13. |
Recheck the engine coolant level.
|
| Inspection |
| 1. |
Check each part for cracks, damage or wear, and replace the coolant
pump assembly if necessary.
|
| 2. |
Check the bearing for damage, abnormal noise and sluggish rotation,
and replace the coolant pump assembly if necessary.
|
| 3. |
Check for coolant leakage. If coolant leaks from hole, the seal is defective.
Replace the coolant pump assembly.
|
Water pump. Troubleshooting
| Troubleshooting |
|
Symptoms |
Possible Causes |
Remedy |
||||||||||||
|
Coolant leakage |
|
Visually check |
|
|
||||||||||
|
||||||||||||||
|
|
|
||||||||||||
|
|
|||||||||||||
|
|
|
||||||||||||
|
Noise |
|
Inspection with a stethoscope |
|
|
||||||||||
|
||||||||||||||
|
Inspection after removing a drive belt |
|
|
||||||||||||
|
||||||||||||||
|
Inspection after removing a water pump |
|
|
||||||||||||
|
Overheating |
|
Loosened impeller |
|
|
||||||||||
|
|
|||||||||||||
 Cylinder Block
Drive Plate. Repair procedures Removal and Installation • Be careful not to damage the parts located under the vehicle (floor under cover, fuel filter, fuel tank and canister) when raising ...
 Lubrication System
Engine Oil. Repair procedures Oil and filter replacement • Be careful not to damage the parts located under the vehicle (floor under cover, fuel filter, fuel tank and canister) when raising ...
See also:
Timing Chain. Components and Components Location
Components 1. Timing chain 2. Timing chain guide 3. Timing chain tension arm 4. Timing chain tension 5. Balance shaft chain 6. Balance shaft chain tension arm 7. Balance shaft chain tension 8. Balance ...
Specifications
Service Data Ignition System Ignition Coil Item Specification Rated Voltage (V) 13.5V Secondary Coil [Engine 1000RPM standard] Input voltage (V) 13.5V Dwell Time (ms) 4.0 - 4.6 Spark current (mA) Min. ...
Cruise control system
1.Cruise indicator 2.Cruise set indicator The cruise control system allows you to program the vehicle to maintain a constant speed without depressing the accelerator pedal. This system is designed to ...


