 Hyundai Santa Fe (TM): Evaporative Emission Control System
Description and operation
| Description |
Evaporative Emission Control System prevents fuel vapor stored in fuel tank
from vaporizing into the atmosphere. When the fuel evaporates in the fuel tank,
the vapor passes through vent hoses or tubes to the canister filled with charcoal
and the canister temporarily holds the vapor in the charcoal.
If ECM determines to draw the gathered vapor into the combustion chambers during
certain operating conditions, it will use vacuum in intake manifold to move
it.
Schematic diagrams
| Schematic Diagram |
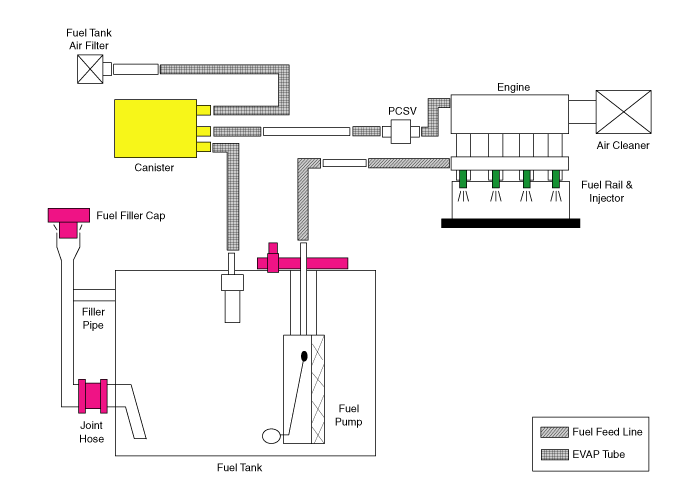
Canister
Canister is filled with charcoal and absorbs evaporated vapor in fuel tank.
The gathered fuel vapor in canister is drawn into the intake manifold by the
ECM/PCM when appropriate conditions are set.
Purge Control Solenoid Valve (PCSV)
Purge Control Solenoid Valve (PCSV) is installed in the passage connecting canister
and intake manifold. It is a duty type solenoid valve and is operated by ECM/PCM
signal.
To draw the absorbed vapor into the intake manifold, the ECM/PCM will open the
PCSV, otherwise the passage remains closed.
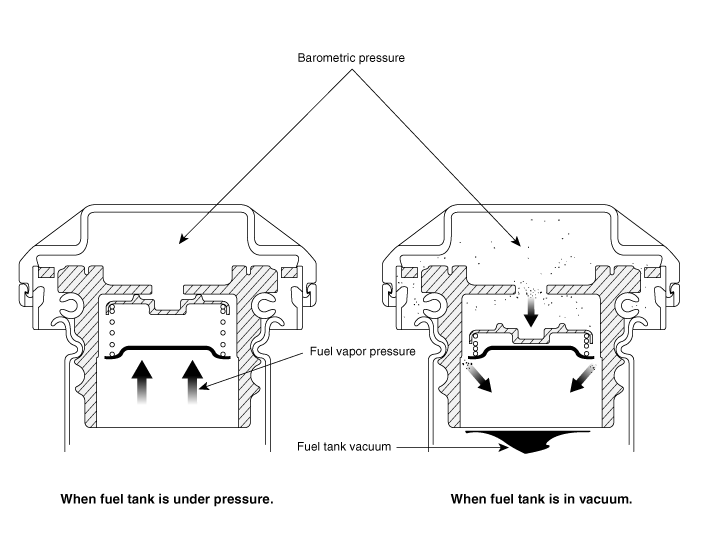
Fuel Filler Cap
A ratchet tightening device on the threaded fuel filler cap reduces the chances
of incorrect installation, which would seal the fuel filler. After the gasket
on the fuel filler cap and the fill neck flange contact each other, the ratchet
produces a loud clicking noise indicating the seal has been set.
Canister. Repair procedures
| Removal |
|

| 1. |
Turn the ignition switch OFF and disconnect the battery (-) terminal.
|
| 2. |
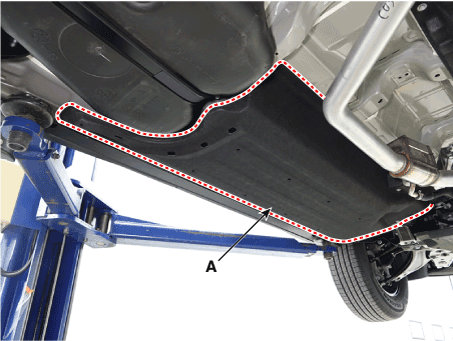
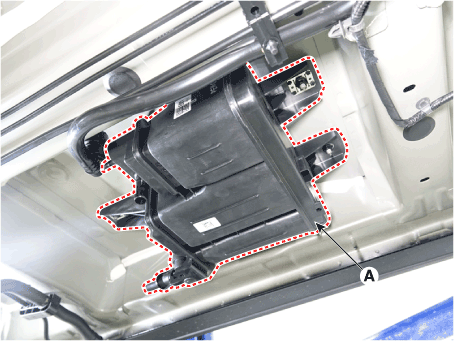
Remove the floor under cover (A).
|
| 3. |
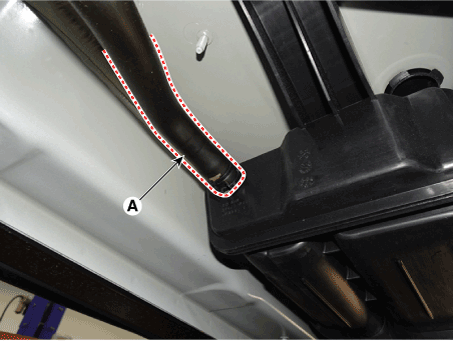
Disconnect the vent hose (A).
|
| 4. |
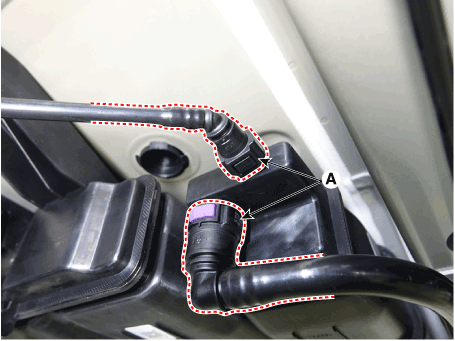
Disconnect the vapor hose quick-connector (A).
|
| 5. |
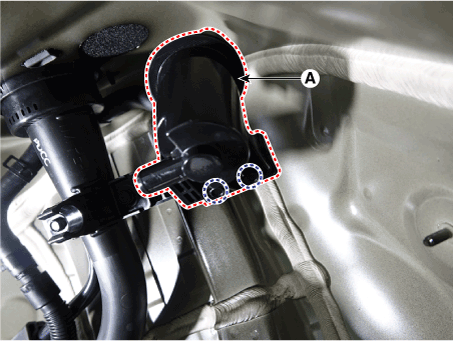
Remove the canister (A) after loosening the mounting nuts.
|
| Installation |
| 1. |
Install in the reverse order of removal.
|
| Inspection |
| 1. |
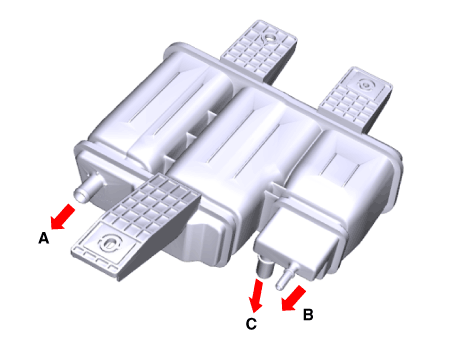
Check for the following items visually.
A : Canister ↔ Atmosphere
B : Canister ↔ Fuel Tank
C : Canister ↔ Intake Manifold
|
Fuel Filler Cap. Description and operation
| Description |
A ratchet tightening device on the threaded fuel filler cap reduces the chances
of incorrect installation, which seals the fuel filler. After the gasket on
the fuel filler cap and the filler neck flange contact each other, the ratchet
produces a loud clicking noise indicating the seal has been set.
Fuel Tank Air Filter. Repair procedures
| Removal |
|
| 1. |
Turn the ignition switch OFF and disconnect the battery (-) terminal.
|
| 2. |
Lift the vehicle.
|
| 3. |
Remove the rear-left wheel & tire and wheel house cover.
|
| 4. |
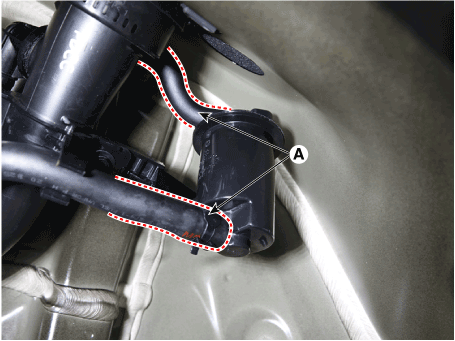
Separate the ventilation hoses (A).
|
| 5. |
Remove the fuel tank air filter (A) after loosening the mounting bolts.
|
| Installation |
| 1. |
Install in the reverse order of removal.
|
 Crankcase Emission Control System
Schematic diagrams Schematic Diagram 1. PCV Valve 2. Breather hose 3. Air intake hose 4. Intake maifold 5. Air breather hose 6. Cylinder block Positive Crankcase Ventilation (PCV) Valve. Description and ...
 Exhaust Emission Control System
Description and operation Description Exhaust emissions (CO, HC, NOx) are controlled by a combination of engine modifications and the addition of special control components. Modifications to the combustion ...
See also:
Head Up Display System
Description and operation Description 1. System operation HUD system displays various information on the windshield glass which minimizes the driver’s eye movement to enhance safety and convenience. ...
Specifications
Specifications Item Specification Master cylinder Type Tandem I.D. mm (in) 22.22 mm (0.87 in) Piston stroke mm (in) 45 mm (1.77 in) Brake booster Type 11" Tie-rod Boosting ratio 1899-12-31T09:01:00.000 ...
Specifications
Specifications Tightening Torques Items N.m Kgf.m lb-ft Transfer assembly mounting bolts 60.8~65.7 6.2~6.7 44.8~48.5 4WD ECM mounting nuts 9.8~11.8 1.0~1.2 7.2~8.7 Coupling assembly mounting bolts 56.9~64.7 ...
