 Hyundai Santa Fe: Panorama Sunroof Assembly. Repair procedures
Replacement
[Removal]
| 1. |
Remove the roof trim.
|
| 2. |
Remove the windshield glass.
|
| 3. |
Remove the roof rack.
|
| 4. |
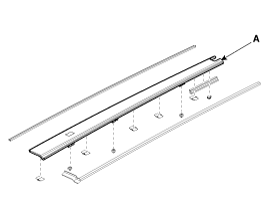
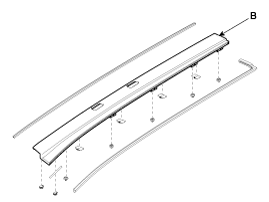
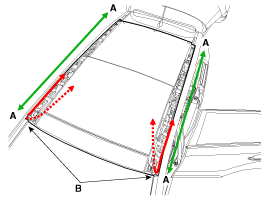
Using a screwdriver or remover remove the rear roof molding (A)
and the front roof molding (B).
[Rear]
[Front]
|
| 5. |
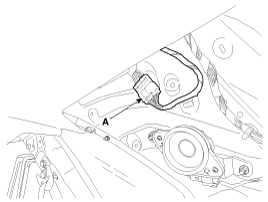
Remove the panorama sunroof motor connector (A) by pressing the
lock pin.
|
| 6. |
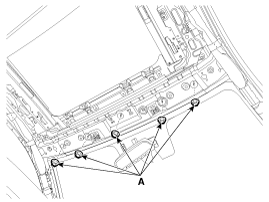
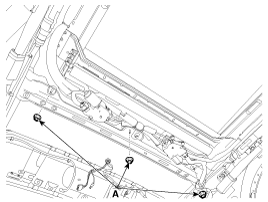
Loosen the panorama sunroof nuts (A).
[Front]
[Rear]
|
| 7. |
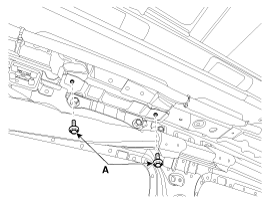
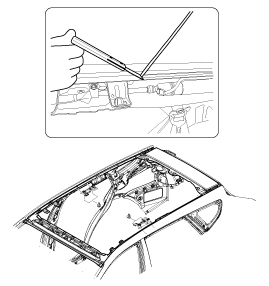
Loosen the bolts (A) on the side of the
|
| 8. |
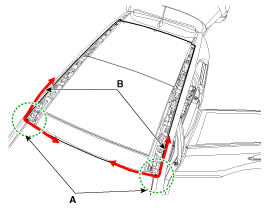
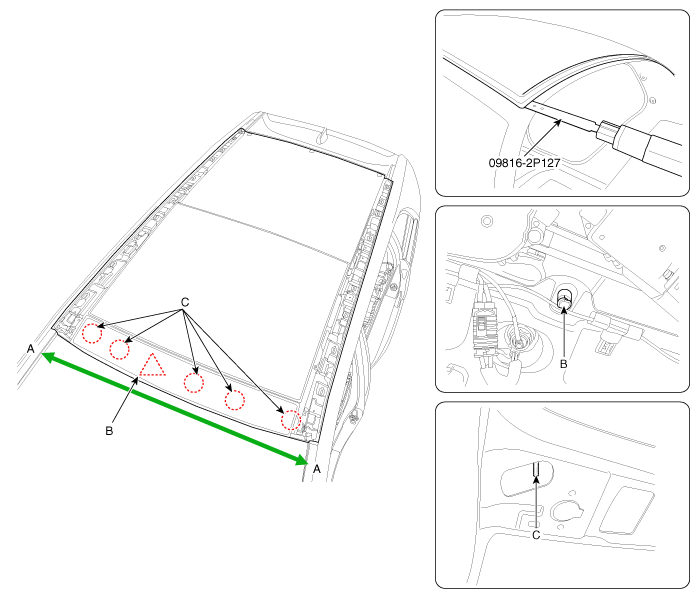
Cut off the sealant on the front edge while pulling a wire (B)
left and right.
|
| 9. |
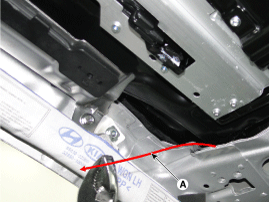
If a wire is visible inside the chassiss, pull the wire line (A)
inside.
|
| 10. |
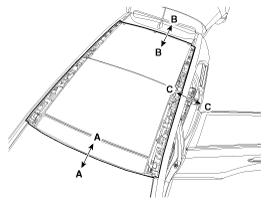
Cut off the sealant on the side (A-A) while pulling a wire (B)
left and right.
|
| 11. |
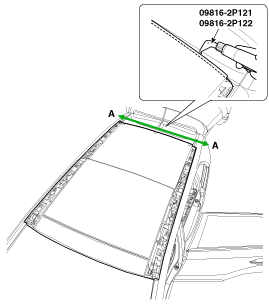
Remove the sealant located in the front side (A-A) by using special
tools (09816-2P121, 09816-2P122) while lifting the panorama sunroof
from the chassis with a scraper or flat-tip screwdriver.
|
| 12. |
Remove the sealant located in the rear side (A-A) by using special
tools (09816-2P121, 09816-2P122) while lifting the panorama sunroof
from the chassis with a scraper or flat-tip screwdriver.
|
| 13. |
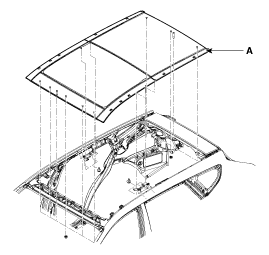
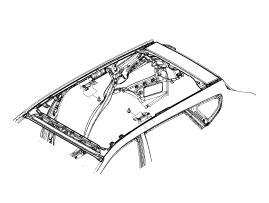
Remove the panorama sunroof assembly (A) after cutting off all
sides of the sealant.
|
[Installation]
| 1. |
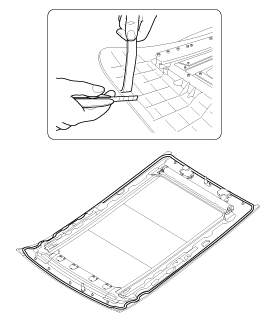
With a knife, scrape the old adhesive smooth to a thickness of
about 2mm (0.08 in.) on the bonding surface around the entire panorama
sunroof opening flange.
|
| 2. |
Clean the body bonding surface with a sponge dampened in alcohol.
After cleaning, keep oil, grease and water from getting on the clean
surface.
|
| 3. |
Clean the edge of the body panel and panorama sunroof with alcohol
or airgun.
|
| 4. |
Apply primer on the edge of the body panel.
|
| 5. |
Apply primer on the edge of the pamorama sunroof.
|
| 6. |
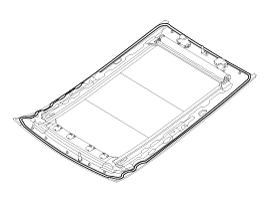
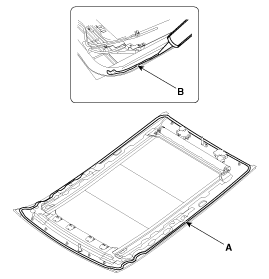
Apply sealant (B) on the panorama sunroof (A) with a sealant gun.
|
| 7. |
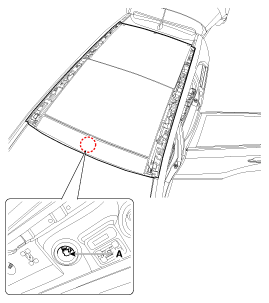
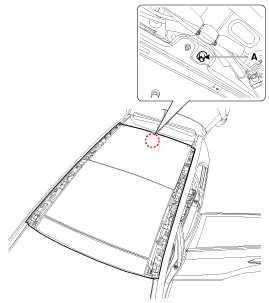
When intalling the panorama sunroof, match the body centering
device hole (A) and place the panorama sunroof on the body flange.
[Front]
[Rear]
|
| 8. |
After installing the panorama sunroof check the alignment and
gap of each side.
|
| 9. |
Install the panorama sunroof mounting nuts (A).
[Front]
[Rear]
|
| 10. |
Install the bolts (A) on the side of the
|
| 11. |
Connect the panorama sunroof motor connector (A).
|
| 12. |
Install the
|
| 13. |
Test for water leaks.
|
| 14. |
If a leak occurs apply sealant.
|
| 15. |
Install the rear roof molding (A) and the front roof molding (B).
[Front]
[Rear]
|
| 16. |
Install the roof rack.
|
| 17. |
Install the roof trim assembly.
|
 Panorama Sunroof Assembly. Components and Components Location
Components Location 1. Panorama sunroof assembly ...
 Mirror
...
See also:
Armrest
To use the armrest, pull it forward from the seatback. ...
Rear Door Side Weatherstrip. Repair procedures
Replacement 1. Loosen the rear door checker (B) mounting bolt. Tightening torque : 19.6 ~ 29.4 N.m (2.0 ~ 3.0 kgf.m,14.5 ~ 21.7 lb-ft) 2. Detach the clips, then remove the rear door side weatherstrip (A). ...
Components and Components Location
Components 1. Cooling fan 2. Radiator upper hose 3. Radiator lower hoseRadiator cap 4. Radiator 5. Condenser 6. Air guard 7. Over flow hose 8. Reservior tank ...

