 Hyundai Santa Fe: Rear Seat Assembly. Repair procedures
Replacement
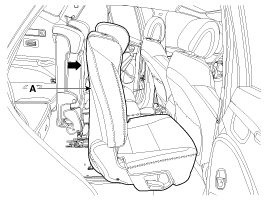
[Second row seat assembly]
| 1. |
Push the second row seat assembly [RH] (A) towards the front of
the vehicle as far as possible.
|
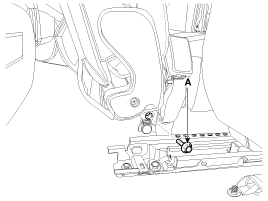
| 2. |
Loosen the second center seat belt buckle mounting bolt (A).
|
| 3. |
Push the second row seat assembly towards the front of the vehicle
as far as possible.
|
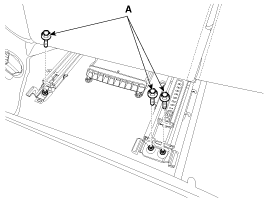
| 4. |
Loosen the second row seat assembly rear mounting bolts (A).
[LH]
[RH]
|

| 5. |
Push the second row seat assembly towards the rear of the vehicle
as far as possible.
|
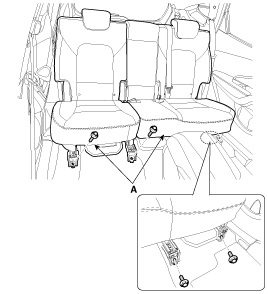
| 6. |
After loosening the mounting bolts, then remove the second row
seat assembly (A).
|
| 7. |
Install in the reverse order of removal.
|
[Third row seat assembly]
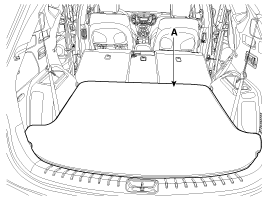
| 1. |
Remove the luggage covering met (A).
|
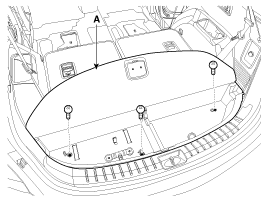
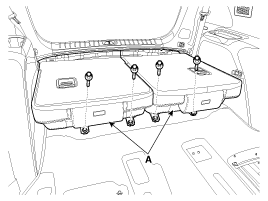
| 2. |
After loosening the mounting screws, then remove the luggage floor
box (A).
|
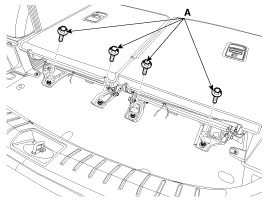
| 3. |
Loosen the third row seat assembly rear mounting bolts (A).
|
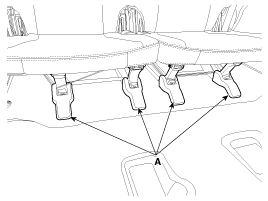
| 4. |
Remove the third row seat track mounting cover (A).
|
| 5. |
After loosening the mounting bolts, then remove the third row
seat assembly (A).
|
| 6. |
Install in the reverse order of removal.
|
 Rear Seat Assembly. Components and Components Location
Component Location [Second row seat assembly] 1. Second row seat assembly [LH] 2. Second row seat assembly [RH] [Third row seat assembly] 1. Third row seat assembly [LH] 2. Third row seat assembly [RH] ...
 Rear Seat Back Cover. Components and Components Location
Component Location [Second row seat assembly] 1. Rear seat back cover [LH] 2. Rear seat back cover [RH] [Third row seat assembly] 1. Rear seat back cover [LH] 2. Rear seat back cover [RH] ...
See also:
Components and Components Location
Component Location 1. Rear wiper arm & blade 2. Tailgate glass hole 3. Grommet 4. Rear wiper arm nut 5. Rear wiper motor assembly 6. Head cap 7. Rear wiper motor bolt ...
Temperature control
The temperature will increase by pushing the up button. Each push of the button will cause the temperature to increase by 1°F/0.5°C. The temperature will decrease by pushing the down button. Each push ...
Valve Body. Components and Components Location
Component Location 1. Automatic transaxle 2. Valve body assembly 1. Pressure Control Valve(PCV) adjust screw 2. Solenoid valve bracket 3. Oil temperature sensor 4. Line Pressure Control Solenoid Valve ...
