 Hyundai Santa Fe: Roller Blind. Repair procedures
Replacement
[Removal]
| 1. |
Open the roller blind using the panorama sunroof switch.
|
| 2. |
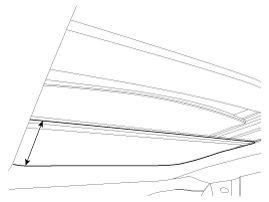
Remove the roof trim.
|
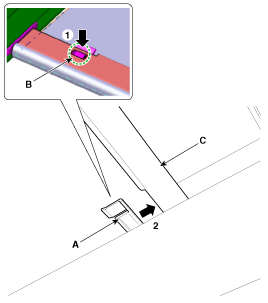
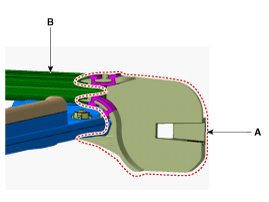
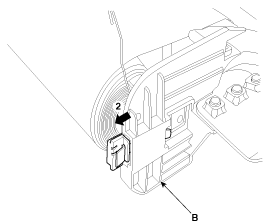
| 3. |
Remove the roller blind bar (C) by pressing the top part of the
lock pin (B) located on the both sides of the roller blind shoe (A).
|
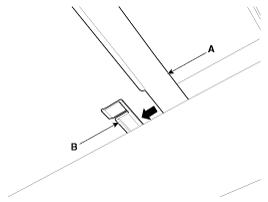
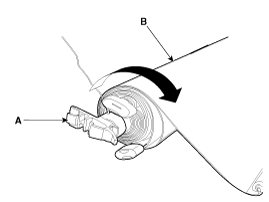
| 4. |
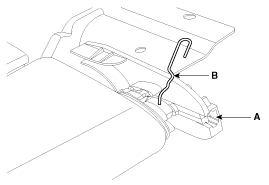
Put a fixed pin (B) into the hole located inside the groove of
the right side roller blade side bracket (A). Becareful not to release
tension.
|
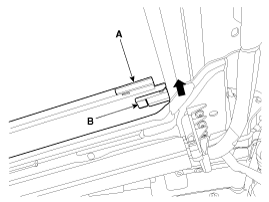
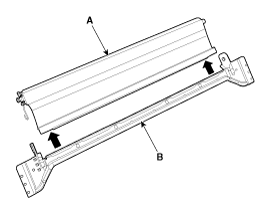
| 5. |
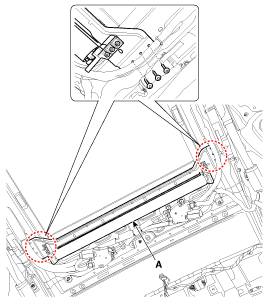
Remove the roller blind lower support (A) by loosening the mounting
screws.
|
[Installation]
| 1. |
Install the roller blind side bracket (A) fit into the guide groove
(B).
|
| 2. |
Tighten the mounting screws after installing the roller blind
lower support (A).
|
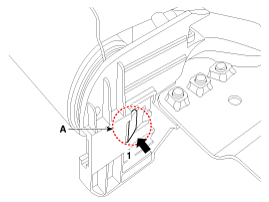
| 3. |
Remove the fixed pin (B) located inside the right side roller
blade side bracket (A).
|
| 4. |
Install the roller blind bar (A) on top of the roller blind shoe
(B).
|
| 5. |
Put the roller blind bar (A) into the roller blind shoe (B).
|
| 6. |
Install the
|
| 7. |
Completely close the movable glass using the panorama sunroof
switch.
|
|
 Panorama Sunroof Deflector. Repair procedures
Replacement 1. Completely open the movable glass using the panorama sunroof switch. 2. Loosen he mounting screws (A) located at the side of the panorama sunroof deflector. • Be careful not to damage ...
 Panorama Sunroof Assembly. Components and Components Location
Components Location 1. Panorama sunroof assembly ...
See also:
SRS Control Module (SRSCM). Components and Components Location
Components ...
Battery. Troubleshooting
Troubleshooting ...
Multimedia Jack. Description and Operation
Description The multimedia jack on the console upper cover is for customers who like to listen to external portable music players like the MP3, iPod and etc., through the vehicle's sound system when ...
