 Hyundai Santa Fe: Torque Converter Control Solenoid Valve (T/CON_VFS). Repair procedures
Inspection
| 1. |
Turn ignition switch OFF.
|
| 2. |
Remove the air duct.
|
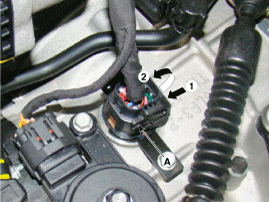
| 3. |
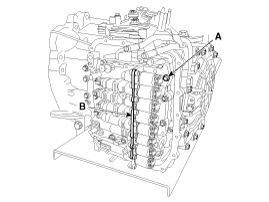
Disconnect the solenoid valve connector(A).
|
| 4. |
Measure resistance between sensor signal terminal and sensor ground
terminal.
|
| 5. |
Check that the resistance is within the specification.
|
Removal
| 1. |
Remove the air duct.
|
| 2. |
Remove the battery and the battery tray.
|
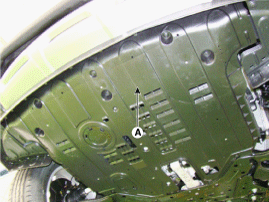
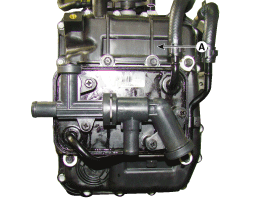
| 3. |
Remove the under cover(A).
|
| 4. |
Drain the coolant.
|
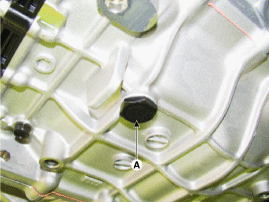
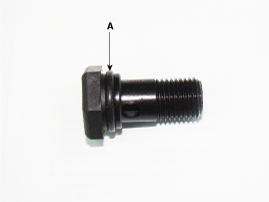
| 5. |
Remove the drain plug (A) and reinstall the drain plug after draining
ATF totally.
|
| 6. |
Remove the wiring bracket installation bolt (A).
|
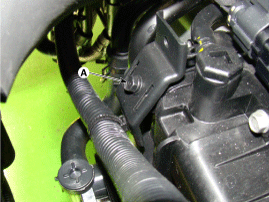
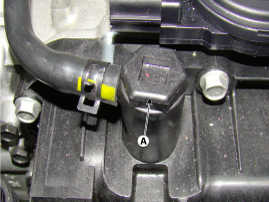
| 7. |
Remove the ATF Injection hole(eyebolt)(A).
|
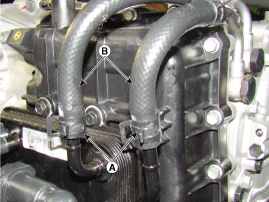
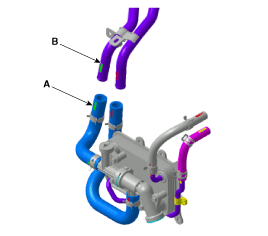
| 8. |
Disconnect the coolant hose (B) after removing the coolant hose
clamp (A).
|
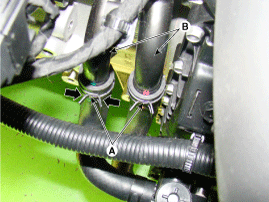
| 9. |
Disconnect the hose (B) after removing the automatic transaxle
fluid cooler hose clamp (A).
|
| 10. |
Remove the valve body cover (A).
|
| 11. |
Remove the bolts (C) after disconnecting the solenoid valve connector
(B) and the oil temperature sensor connector (A).
|
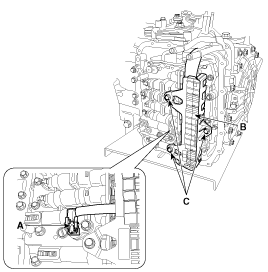
| 12. |
Remove the solenoid valve support bracket (B) and the valve body
mounting bolt (A-1ea).
|
| 13. |
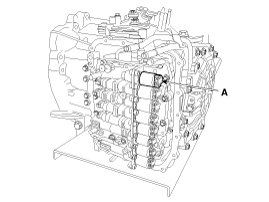
Remove the torque converter control solenoid valve (A).
|
Installation
| 1. |
Install in the reverse order of removal.
|
 Torque Converter Control Solenoid Valve (T/CON_VFS). Schematic Diagrams
Circuit Diagram ...
 26 Brake Control Solenoid Valve(26/B_VFS). Description and Operation
Description 26Brake control solenoid valve(26/B) is attached to the valve body. This variable force solenoid valve directly controls the hydraulic pressure inside the 26Brake. ...
See also:
Oil hydraulic Motor(Actuator). Schematic Diagrams
Circuit Diagram ...
Repair procedures
Component Replacement After Deployment Before doing any SRS repairs, use the GDS to check for DTCs. Refer to the Diagnostic Trouble Code list for repairing of the related DTCs. When the front airbag(s) ...
Curtain Airbag (CAB) Module. Description and Operation
Description Curtain airbags are installed inside the headliner (LH and RH) and protect the driver and passenger from danger when side crash occurs. The SRSCM determines deployment of curtain airbag by ...
