 Hyundai Santa Fe: Transfer Fluid. Repair procedures
Inspection
|
| 1. |
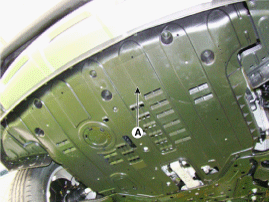
Remove the under cover (A).
|
| 2. |
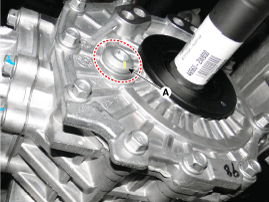
Remove the oil filler plug (A).
|
| 3. |
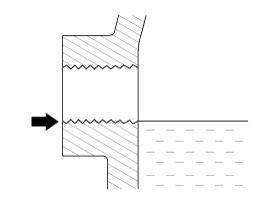
Check the oil level.
|
| 4. |
Install the oil filler plug with new gasket.
|
| 5. |
Install the under cover.
|
Replacement
Severe driving conditions
* Transfer oil should be replaced if the transfer assembly is
fall into the water.
|
||||||||||||||||
| 1. |
Remove the under cover (A).
|
| 2. |
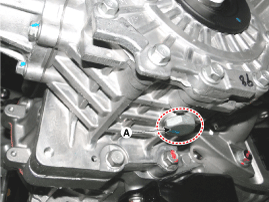
Drain the transfer oil after loosening the drain plug (A).
|
| 3. |
Install the drain plug with new gasket.
|
| 4. |
Remove the oil filler plug (A).
|
| 5. |
Add new oil through the filler plug hole.
|
| 6. |
Install the oil filler plug with new gasket.
|
| 7. |
Install the under cover.
|

 Front Wheel Components and Components Location
Components Location 1.Under cover 2. Transaxle Assembly 3. Transfer assembly 4. Propeller shaft 5. Coupling assembly ...
See also:
Cooling Fan. Description and Operation
Description Control the cooling motor voltage in according to the duty(300Hz) of ECM. [ECU → PWM Input Signal(SI : 300Hz)] SI Duty Motor Voltage (V) 10% 0 ─ 30% 4.1 ± 0.65 60% 8.2 ...
Spark Plug. Repair procedures
Inspection [On vehicle inspection] 1. Accelerate the engine to about 3,000 rpm 3 times or more. 2. Remove the spark plug. 3. Check the spark plug visually. If the electrode is dry, the spark plug is normal. ...
Repair procedures
Replacement 1. Remove the cap (A) and remove the nuts, then remove the wiper arm (B). Tightening torque : 22.6 ~ 26.5 N.m(2.3 ~ 2.7 kgf.m, 16.6 ~ 19.5 lb-ft) 2. Detach the clips, then remove the fender ...
