
 Hyundai Santa Fe: Cooling Fan. Repair procedures
Removal and Installation
| Cooling Fan Assembly |
| 1. |
Disconnect the battery terminals.
|
| 2. |
Remove the air cleaner assembly.
|
| 3. |
Remove the under cover.
|
| 4. |
Remove the front bumper cover.
|
| 5. |
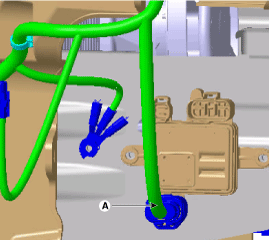
Disconnect the PWM module connector(A).
|
| 6. |
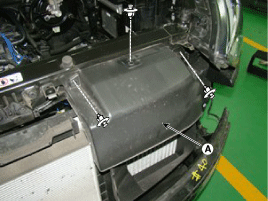
Remove the air intake shield(A).
|
| 7. |
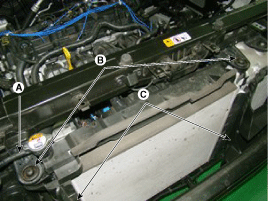
Remove the radiator over flow hose (A) and upper
bracket (B), air guard(C).
|
| 8. |
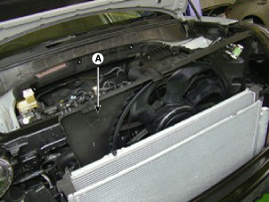
Loosen the cooling fan mounting bolts and then disconnect
the cooling fan assembly (A) from radiator.
|
| 9. |
Install in the reverse order of removal.
|
| 1. |
Remove the LH wheel guard.
|
| 2. |
Disconnec the PWM connectors and then remove the
PWM module(A).
|
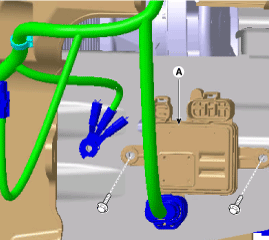
| 3. |
Install in the reverse order of removal.
|
Disassembly
| 1. |
Remove the cooling fan(A) from cooling assembly.
|
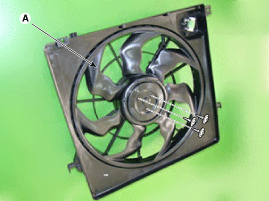
| 2. |
Remove the fan motor(A) from cooling fan shroud.
|
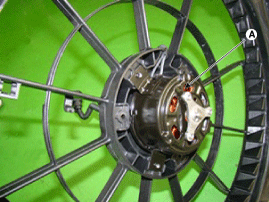
| 3. |
Install in the reverse order of removal.
|
 Cooling Fan. Schematic Diagrams
Circuit Diagram PWM Circuti Diagram ...
 Reservoir Tank. Repair procedures
Removal and Installation 1. Remove the over flow hose(A). 2. Remove the reservoir tank(B). Tightening torque: 7.8 ~ 11.7 N.m (0.8 ~ 1.2 kgf.m, 5.7 ~ 8.6 lb-ft) 3. Install in the reverse order of removal. ...
See also:
Schematic Diagrams
System Block Diagram Component Parts And Function Outline Component part Function Vehicle-speed sensor Converts vehicle speed to pulse. ECM Receives signals from sensor and control switches. Cruise control ...
Dynamic Damper. Repair procedures
Removal 1. Remove the front driveshaft. 2. Remove the TJ joint assembly. 3. Remove the remove the both side of band (B) of the dynamic damper (A). 4. Fix the driveshaft (A) with a vice (B) as illustrated. ...
Components and Components
Location
Components Connector Pin Information No. Connector A Connector B Connector C Connector D 1 IGN1 Head lamp low switch Wiper low relay Room lamp 2 ACC Auto light switch Burglar alarm relay Cornering lamp ...
