See also:
Front Fog Lamps. Repair procedures
Inspection Front Fog Lamp Switch 1. With the fog lamp switch in each position, make sure that continuity exists between the terminals below. If continuity is not as specified, replace the multifunction ...
Intake Air Temperature Sensor (IATS). Specifications
Specification Temperature Resistance (kΩ) °C °F -40 -40 40.93 ~ 48.35 -20 -4 13.89 ~ 16.03 0 32 5.38 ~ 6.09 10 50 3.48 ~ 3.90 20 68 2.31 ~ 2.57 40 104 1.08 ~ 1.21 60 140 0.54 ~ 0.62 80 176 0.29 ...
Crash Pad Under Cover. Repair procedures
Replacement • Put on gloves to protect your hands. • When prying with a flat-tip screwdriver, wrap it with protective tape, and apply protective tape around the related parts, to prevent damage. • ...
 Hyundai Santa Fe: Front Pillar Trim. Repair procedures
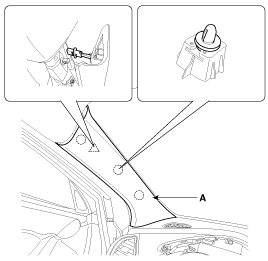
 Front Pillar Trim. Components and Components Location
 Center Pillar Trim. Components and Components Location