
 Hyundai Santa Fe: Power Window Switch. Repair procedures
Diagnosis With GDS
| 1. |
The BCM can be diagnosed by using the GDS. The BCM
communicates with the GDS which then displays inputs and outputs along
with codes.
It will be able to diagnose defects of power door
lock/unlock with GDS quickly. GDS can operates actuator forcefully,
input/output value monitoring and self diagnosis.
|
| 2. |
To diagnose the SJB function, select the vehicle
model, BCM and DDM/ADM.
|
| 3. |
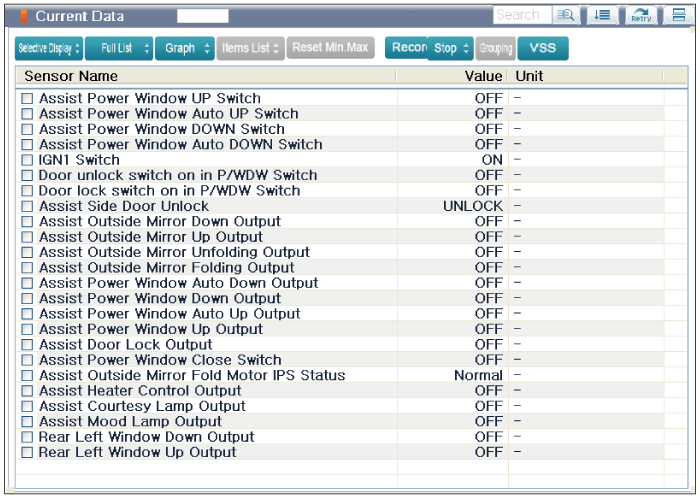
Select "Input/output monitoring", if you will check
current data of power door lock system. It provides input/output status
of DDM/ADM.
|
| 4. |
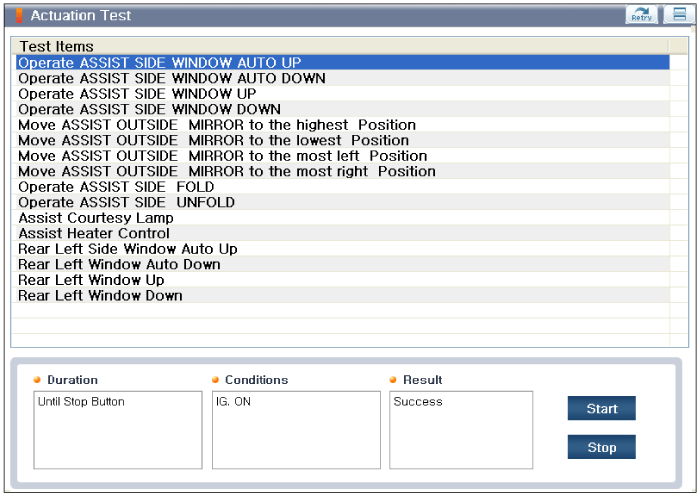
To perform functional test on SJB outputs, select
"Actuation Test".
|
Removal
Driver Power Window Switch
| 1. |
Disconnect the negative (-) battery terminal.
|
| 2. |
Remove the front door trim.
|
| 3. |
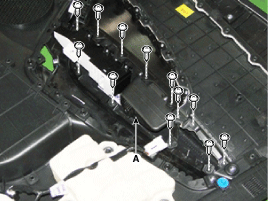
Remove the power window bezzel assembl (A) after
loosening the mounting screws (12EA).
|
| 4. |
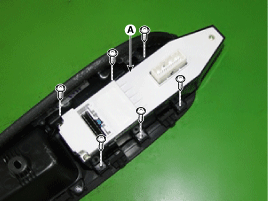
Remove the power window switch assembly (A) after
loosening the mounting screws (6EA).
|
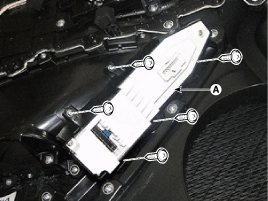
Assist Power Window Switch
| 1. |
Disconnect the negative (-) battery terminal.
|
| 2. |
Remove the front door trim.
|
| 3. |
Remove the power window switch assembly (A) after
loosening the mounting screws (5EA).
|
Rear Power Window Swtich
| 1. |
Disconnect the negative (-) battery terminal.
|
| 2. |
Remove the rear door trim.
|
| 3. |
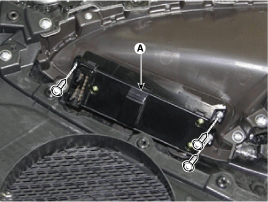
Remove the power window switch assembly (A) after
loosening the mounting screws (3EA).
|
| 4. |
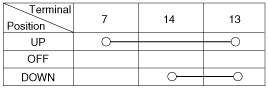
Check for continuity between the terminals in each
switch position according to the table. If the continuity condition
is not normal, replace the switch.
|
Installation
Driver Power Window Switch
| 1. |
Install the power window switch assembly.
|
| 2. |
Install the front door trim after connect the connector.
|
Assist Power Window Switch
| 1. |
Install the power window switch assembly.
|
| 2. |
Install the front door trim after connect the connector.
|
Rear Power Window Swtich
| 1. |
Install the power window switch assembly.
|
| 2. |
Install the rear door trim after connect the connector.
|
 Power Window Switch. Schematic Diagrams
Circuit Diagram Driver Power Window Switch Assist Power Window Switch Rear Power Window Switch ...

See also:
Fluid. Repair procedures
Service Adjustment Procedure Oil level Check A check of ATF level is not normally required during scheduled services. If an oil leak is found, perform the oil level check procedure after replairs are completed. ...
Starter. Schematic Diagrams
Circuit Diagram ...
Body Panel Gaps. Body Repair
Front & Rear Dimension Side Dimension ...
