 Hyundai Santa Fe: Roof Rack. Repair procedures
Replacement
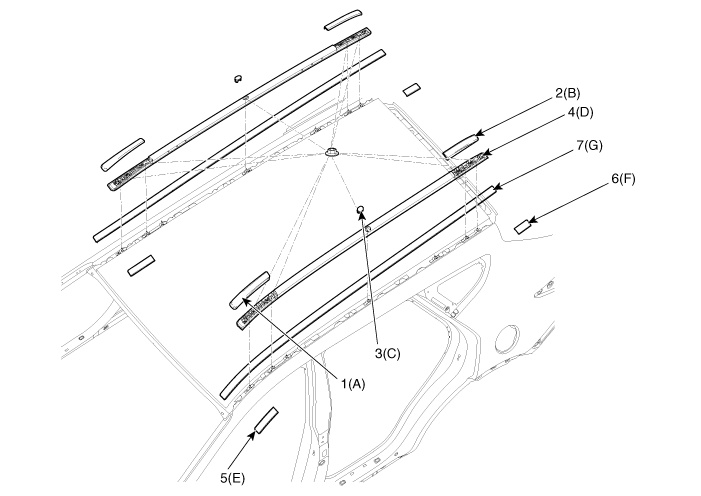
[General Type]
|
|
| 1. |
Remove the roof rack front cover (A) and roof rack rear cover
(B).
|
| 2. |
Remove the roof rack center cover (C).
|
| 3. |
After loosening the mounting nuts, then remove the roof rack assembly
(D).
|
| 4. |
Remove the roof front moulding (E) and roof rear moulding (F).
|
| 5. |
Using a screwdriver or remover, remove the roof moulding (G).
|
| 6. |
Install in the reverse order of removal.
|
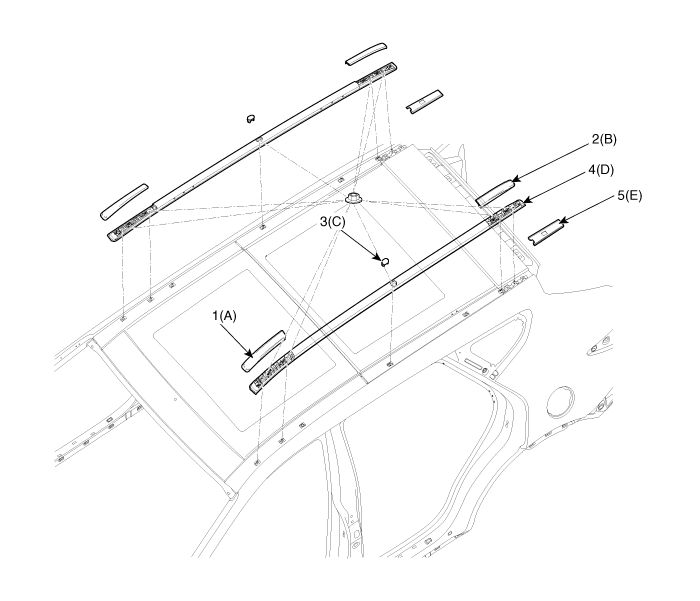
[Panorama sunroof Type]
|
|
| 1. |
Remove the roof rack front cover (A) and roof rack rear cover
(B).
|
| 2. |
Remove the roof rack center cover (C).
|
| 3. |
After loosening the mounting nuts, then remove the roof rack assembly
(D).
|
| 4. |
Using a screwdriver or remover, remove the roof moulding (E).
|
| 5. |
Install in the reverse order of removal.
|

 Delta Garnish. Repair procedures
Replacement • Put on gloves to protect your hands. • When prying with a flat-tip screwdriver, wrap it with protective tape, and apply protective tape around the related parts, to prevent damage. • ...
See also:
Schematic Diagrams
System Block Diagram Component Parts And Function Outline Component part Function Vehicle-speed sensor Converts vehicle speed to pulse. ECM Receives signals from sensor and control switches. Cruise control ...
Do not install a child restraint on the front passenger’s seat.
Never place a rear-facing child restraint in the front passenger’s seat. If the air bag deploys, it would impact the rear-facing child restraint, causing serious or fatal injury. In addition, do not ...
Output Speed Sensor. Schematic Diagrams
Circuit Diagram ...
