 Hyundai Santa Fe: Roof Trim Assembly. Repair procedures
Replacement
|
|
| 1. |
Remove the third row seat.
|
| 2. |
Remove the front pillar trim.
|
| 3. |
Remove the canter pillar upper trim.
|
| 4. |
Remove the rear pillar trim.
|
| 5. |
Remove the sunvisor and retainer.
|
| 6. |
Remove the assist handle.
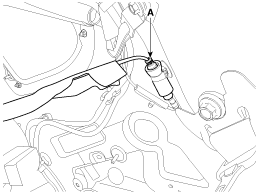
|
| 7. |
Remove the overhead console lamp.
|
| 8. |
Remove the room lamp.
|
| 9. |
Remove the luggage room lamp.
|
| 10. |
Tilt the front seat back towards the rear of the vehicle as far
as possible.
|
| 11. |
Fold the second row seat after pushing it towards the front of
the vehicle as far as possible.
|
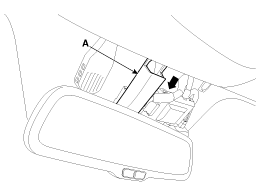
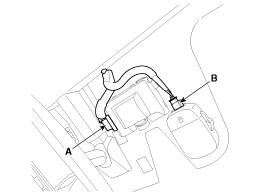
| 12. |
Remove the ECM mirror cover (A).
|
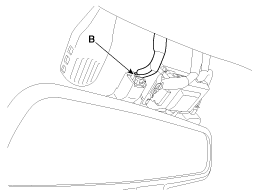
| 13. |
Disconnect the ECM mirror connector (B).
|
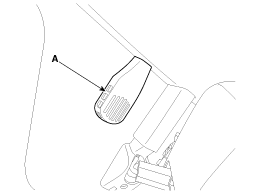
| 14. |
Remove the auto defog sensor cover (A).
|
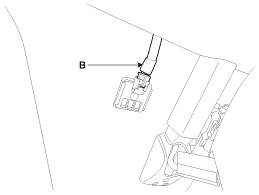
| 15. |
Disconnect the auto defog sensor connector (B).
|
| 16. |
Remove the LDWS & rain sensor cover (A).
|
| 17. |
Disconnect the LDWS connector (A) and rain sensor connector (B).
|
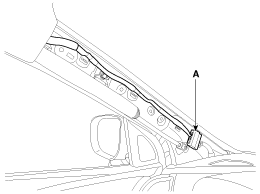
| 18. |
Disconnect the roof trim main connector (A) and the mounting clips
in the front pillar.
[Driver's]
[Passenger's]
|
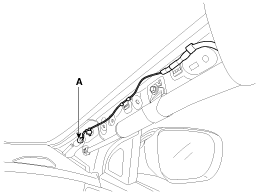
| 19. |
Disconnect the roof antenna connector (A) and the mounting clips
in the rear pillar.
[RH]
|
| 20. |
Slighty remove the tail gate weatherstrip.
|
| 21. |
Slightly lower the rear side of the
|
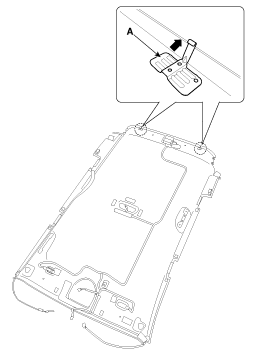
| 22. |
To remove the roof trim, press the lock pin (A) in the direction
of the arrow.
|
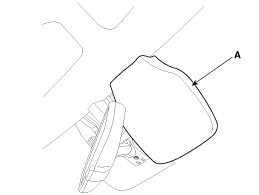
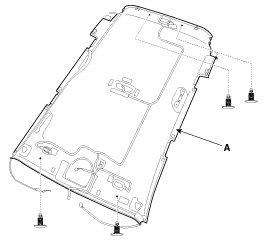
| 23. |
Detach the clips, then remove the roof trim assembly (A).
|
| 24. |
Remove the vanity lamp.
|
| 25. |
Remove the hands free mic.
|
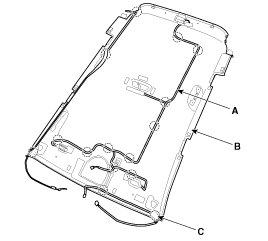
| 26. |
Remove roof trim wiring harness (A) from the roof trim (B).
|
| 27. |
Install in the reverse order of removal.
|
 Roof Trim Assembly. Components and Components Location
Component Location 1. Roof Trim Assembly ...
 Interior Trim
...
See also:
Special Service Tools
Special Service Tools Tool (Number and Name) Illustration Application RKE Battery Checker (09954-2P100) Measuring the RKE battery voltage Correction jig for LDWS or LKAS (09890-3V100) Correction of LDWS ...
CVVT & Camshaft. Components and Components Location
Components 1. Camshaft bearing cap 2. Camshaft front bearing cap 3. Exhaust camshaft 4. Intake camshaft 5. Exhaust CVVT assembly 6. Intake CVVT assembly 7. Exhaust camshaft upper bearing 8. Intake camshaft ...
Transaxle Oil Temperature Sensor. Schematic Diagrams
Circuit Diagram ...
