 Hyundai Santa Fe: Side Body. Body Repair
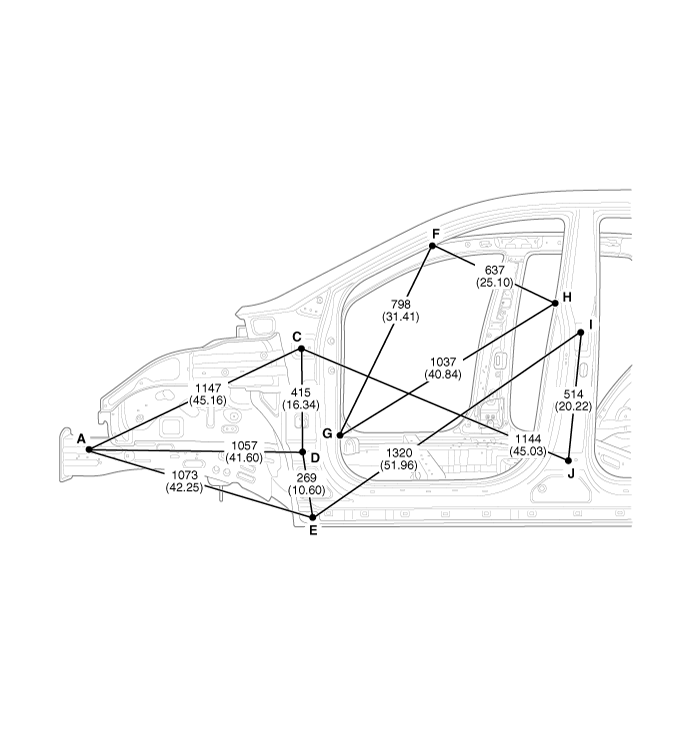
Side Body A
|
* These dimensions indicated in this figure are actual-measurement
dimensions. [ Unit : mm (inch) ] |
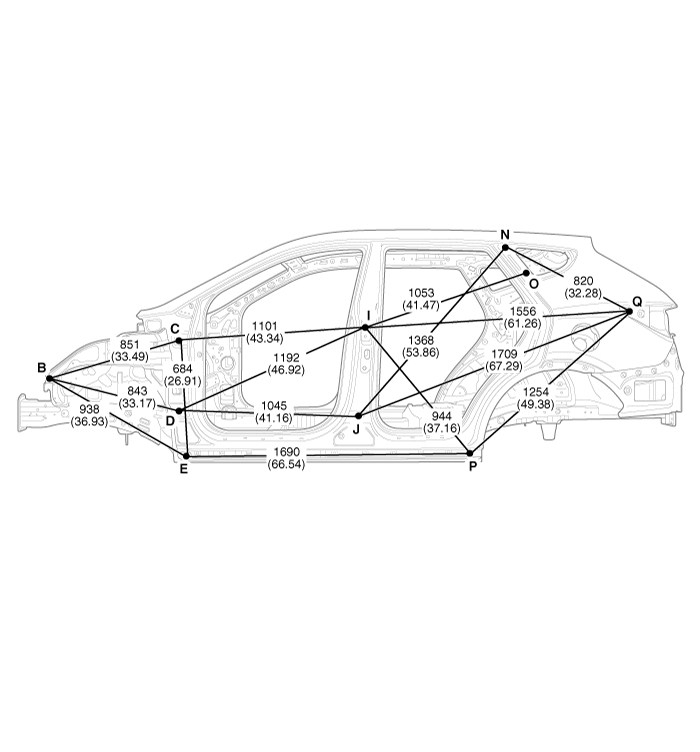
Side Body B
|
* These dimensions indicated in this figure are actual-measurement
dimensions. [ Unit : mm (inch) ] |
Side Body C

|
* These dimensions indicated in this figure are actual-measurement
dimensions. [ Unit : mm (inch) ] |
|
|
|
|
|
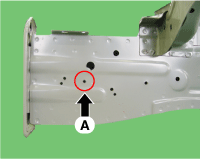
Front side member tooling hole (Ø6.6) |
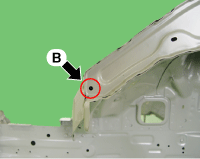
Fender apron upper panel tooling hole (Ø8) |
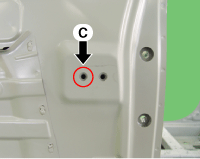
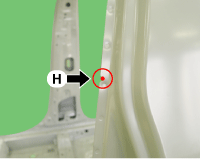
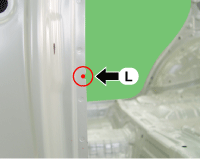
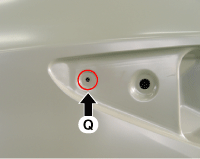
Front door upper hinge mounting hole (Ø13) |
|
|
|
|
|
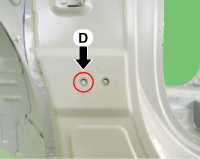
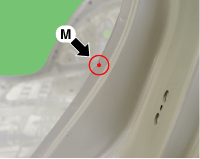
Front door lower hinge mounting hole (Ø13) |
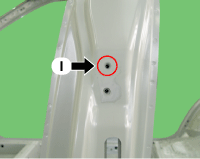
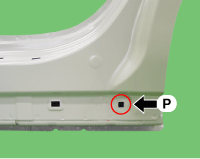
Fender panel mounting hole (Ø6.6) |
Side outer panel notch |
|
|
|
|
|
Side outer panel notch |
Side outer panel notch |
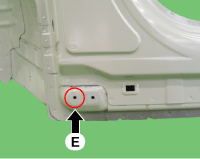
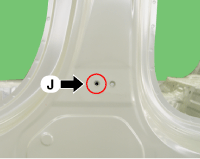
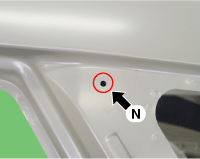
Rear door upper hinge mounting hole (Ø13) |
|
|
|
|
|
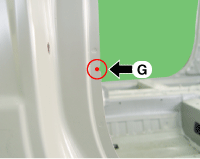
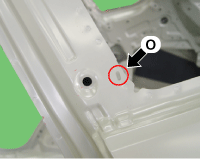
Rear door lower hinge mounting hole (Ø13) |
Side outer panel notch |
Side outer panel notch |

|
|
|
|
|
Side outer panel notch |
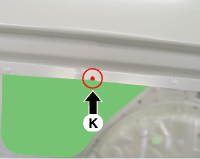
Quarter fixed garnish mounting hole (Ø6.4) |
Quarter fixed garnish mounting hole (5X12) |
|
|
|
|
|
Side sill molding mounting hole (10X10) |
Rear combination lamp housing mounting hole (Ø6) |
|
 Front Body. Body Repair
Front Body A * These dimensions indicated in this figure are actual-measurement dimensions. [ Unit : mm (inch) ] Front Body B * These dimensions indicated in this figure are actual-measurement dimensions. ...
 Interior. Body Repair
Interior A * These dimensions indicated in this figure are actual-measurement dimensions. [ Unit : mm (inch) ] Interior B * These dimensions indicated in this figure are actual-measurement dimensions. ...
See also:
Oil Pump. Components and Components Location
Component Location 1. Automatic transaxle 2. Oil pump assembly Component 1. Reaction shaft support assembly 2. Oil pump housing 3. Driven gear 4. Drive gear 5. Oil seal 6. Bush-Housing 7. Reaction shaft ...
Tail Gate Latch. Repair procedures
Replacement • Put on gloves to protect your hands. • When prying with a flat-tip screwdriver, wrap it with protective tape, and apply protective tape around the related parts, to prevent damage. • ...
Seat Belt Warning Light
This warning light informs the driver that the seat belt is not fastened. For more details, refer to the “Seat Belts” in chapter 3. ...
