
 Hyundai Santa Fe: TJ Joint. Repair procedures
Removal
|

| 1. |
Remove the Front Driveshaft.
|
| 2. |
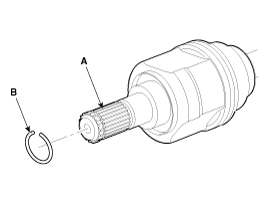
Remove the housing circlip (B) from the driveshaft spline (A).
|
| 3. |
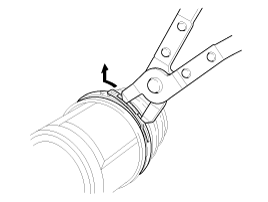
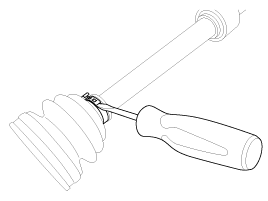
Remove both boot bands from the TJ housing.
|
| 4. |
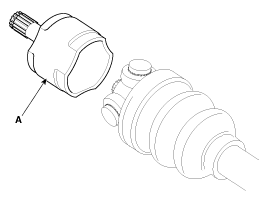
Remove the TJ housing (A).
|
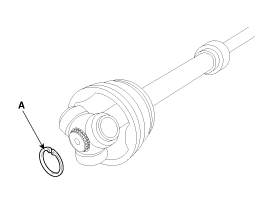
| 5. |
Remove the retainer ring (A) from the shaft.
|
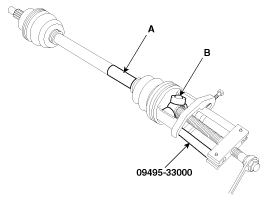
| 6. |
Remove the spider assembly (B) from the driveshaft (A) using the
special tool (09495-33000).
|
| 7. |
Clean the spider assembly.
|
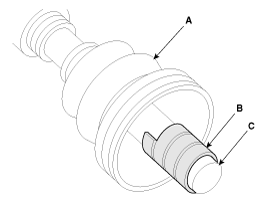
| 8. |
Remove the TJ boot (A).
|
Inspection
| 1. |
Check the spider assembly for roller rotation, wear or corrosion.
|
| 2. |
Check the groove inside the joint case for wear or corrosion
|
| 3. |
Check the TJ boots for damage and deterioration.
|
Installation
| 1. |
Wrap tape around the driveshaft spline(TJ) to prevent damage to
the boot.
|
| 2. |
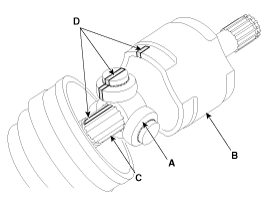
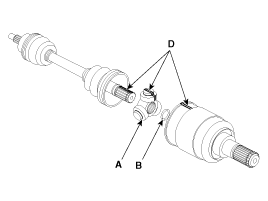
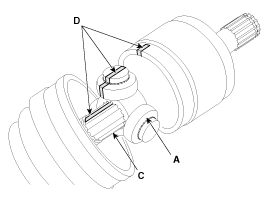
Using the alignment marks (D) made during disassembly as a guide,
install the spider assembly (A) and retainer ring (B) on the driveshaft
splines (C).
|
| 3. |
Add specified grease to the joint boot as much as it was wiped
away at inspection.
|
| 4. |
Install the both boot band.
|
| 5. |
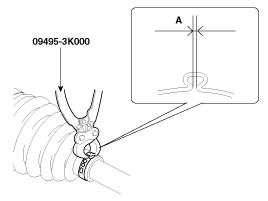
Using the SST(09495-3K000), secure the TJ boot bands.
|
| 6. |
Install the front driveshaft.
|
| 7. |
Check the front alignment.
|
 TJ Joint. Components and Components Location
Components [LH] 1. BJ assembly 2. BJ circlip 3. BJ boot band 4. BJ boot 5. Shaft 6. TJ boot band 7. TJ boot 8. Spider assembly 9. Retainer ring 10. TJ housing 11. Housing circlip [RH] 1. BJ assembly 2. ...
 Dynamic Damper. Components and Components Location
Components 1. BJ assembly 2. BJ circlip 3. BJ boot band 4. BJ boot 5. Dynamic damper band 6. Dynamic damper 7. Shaft 8. TJ boot band 9. TJ boot 10. Spider assembly 11. Retainer ring 12. TJ housing 13. ...
See also:
Windshield defrosting and defogging
WARNING - Windshield heating Do not use the or position during cooling operation in extremely humid weather. The difference between the temperature of the outside air and that of the windshield could cause ...
Passive Occupant Detection System (PODS-F). Components and Components Location
Components ...
One person per belt
Two people (including children) should never attempt to use a single seat belt. This could increase the severity of injuries in case of an accident. ...
