Replacement • Put on gloves to protect your hands. • When prying with a flat-tip screwdriver, wrap it with protective tape, and apply protective tape around the related parts, to prevent damage. • ...
Replacement • Put on gloves to protect your hands. • When prying with a flat-tip screwdriver, wrap it with protective tape, and apply protective tape around the related parts, to prevent damage. • ...
See also:
Battery saver function
The purpose of this feature is to prevent the battery from being discharged. The system automatically turns off the parking lights when the driver removes the ignition key (smart key : turns off the engine) ...
Rear Cross Member. Repair procedures
Replacement 1. Remove the rear wheel & tire. Tightening torque : 88.3 ~ 107.9N.m (9.0 ~ 11.0kgf.m, 65.1 ~ 79.6lb-ft) Be careful not to damage to the hub bolts when removing the front wheel & tire ...
Dimensions
...
 Hyundai Santa Fe: Front Wheel Guard. Repair procedures
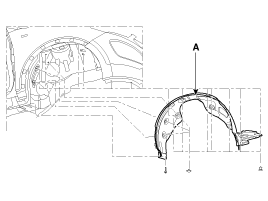
 Door Garnish. Repair procedures
 Rear Wheel Guard. Repair procedures