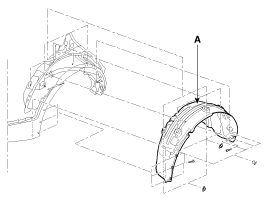
Replacement • Put on gloves to protect your hands. • When prying with a flat-tip screwdriver, wrap it with protective tape, and apply protective tape around the related parts, to prevent damage. • ...
Replacement • Put on gloves to protect your hands. • When prying with a flat-tip screwdriver, wrap it with protective tape, and apply protective tape around the related parts, to prevent damage. • ...
See also:
Fuel Pump Motor. Repair procedures
Removal 1. Remove the fuel pump. (Refer to Fuel Delivery System - “Fuel Pump”) 2. Disconnect the fuel sender connector (A). 3. Release the fixing hooks, and then remove the fuel sender (A). 4. Release ...
Accelerator Pedal. Repair procedures
Removal 1. Turn the ignition switch OFF and disconnect the negative (-) battery cable. 2. Disconnect the accelerator position sensor connector (A). 3. Remove the installation nuts (C), the bolt (B) and ...
Daytime running light
Daytime Running Lights (DRL) can make it easier for others to see the front of your vehicle during the day. DRL can be helpful in many different driving conditions, and it is especially helpful after dawn ...
 Hyundai Santa Fe: Rear Wheel Guard. Repair procedures
 Front Wheel Guard. Repair procedures
 Front Mud Guard. Repair procedures
