Replacement
[Second row seat assembly]
| •
|
Put on gloves to protect your hands.
|
|
| •
|
When prying with a flat-tip screwdriver, wrap it with
protective tape, and apply protective tape around the related
parts, to prevent damage.
|
| •
|
Use a plastic panel removal tool to remove interior trim
pieces to protect from marring the surface.
|
| •
|
Take care not to bend or scratch the trim and panels.
|
|
|
1. |
Remove the second row seat assembly [LH].
|
|
2. |
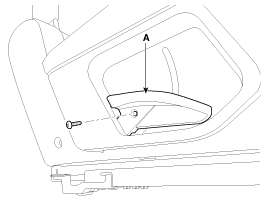
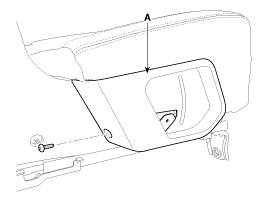
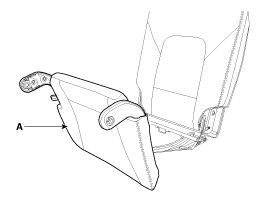
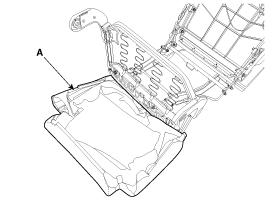
Remove the protector (A) located in the bottom side of the rear
seat cushion.
|
|
3. |
After loosening the mounting screw, then remove the rear seat
slide knob (A).
|
|
4. |
After loosening the mounting screw, then remove the rear seat
slide outer cover (A).
|
|
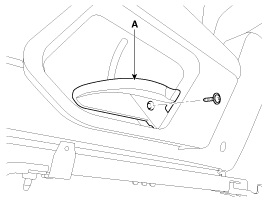
5. |
Remove the protector (A) located in the side part of the rear
seat cushion.
|
|
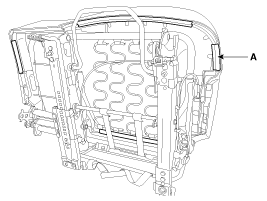
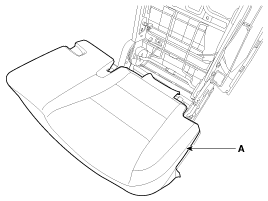
6. |
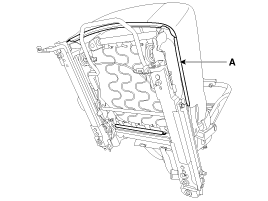
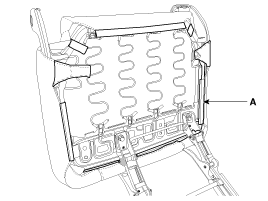
Remove the rear seat cushion cover (A) from the rear seat cushion
frame.
|
|
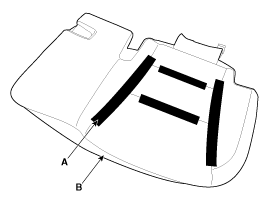
7. |
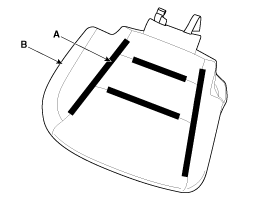
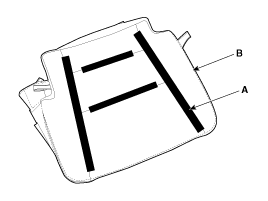
After removing the velcro tape (A) on the rear of seat cushion
and remove the rear seat cushion cover (B).
|
|
8. |
Install in the reverse order of removal.
|
• |
Replace any damaged clips.
|
|
|
| •
|
Put on gloves to protect your hands.
|
|
| •
|
When prying with a flat-tip screwdriver, wrap it with
protective tape, and apply protective tape around the related
parts, to prevent damage.
|
| •
|
Use a plastic panel removal tool to remove interior trim
pieces to protect from marring the surface.
|
| •
|
Take care not to bend or scratch the trim and panels.
|
|
|
1. |
Remove the second row seat assembly [RH].
|
|
2. |
Remove the protector (A) located in the bottom side of the rear
seat cushion.
|
|
3. |
After loosening the mounting screw, then remove the rear seat
slide knob (A).
|
|
4. |
After loosening the mounting screw, then remove the rear seat
slide outer cover (A).
|
|
5. |
Remove the protector (A) located in the side part of the rear
seat cushion.
|
|
6. |
Remove the rear seat cushion cover (A) from the rear seat cushion
frame.

|
|
7. |
After removing the velcro tape (A) on the rear of seat cushion
and remove the rear seat cushion cover (B).
|
|
8. |
Install in the reverse order of removal.
|
• |
Replace any damaged clips.
|
|
|
[Third row seat assembly]
| •
|
Put on gloves to protect your hands.
|
|
| •
|
When prying with a flat-tip screwdriver, wrap it with
protective tape, and apply protective tape around the related
parts, to prevent damage.
|
| •
|
Use a plastic panel removal tool to remove interior trim
pieces to protect from marring the surface.
|
| •
|
Take care not to bend or scratch the trim and panels.
|
|
|
1. |
Remove the third row seat assembly.
|
|
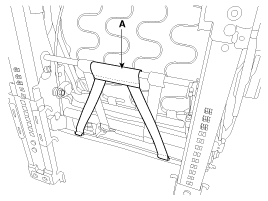
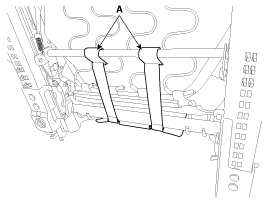
2. |
Loosen the rear seat frame mounting bolts (A).
Tightening torque :
44.1 ~ 53.9 N.m (4.5 ~ 5.5 kgf.m, 32.5 ~ 39.8 lb-ft)
|
|
|
3. |
Push the rear seat cushion frame (A) to the front of the vehicle
as far as possible.
|
|
4. |
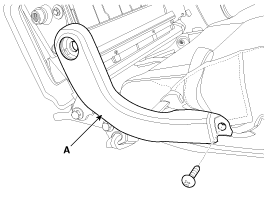
After loosening the mounting screw, then remove the rear seat
outer link cover (A).
|
|
5. |
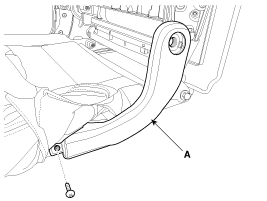
After loosening the mounting screw, then remove the rear seat
inner link cover (A).
|
|
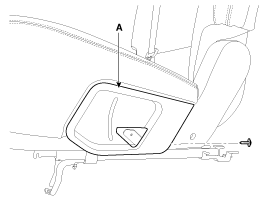
6. |
Remove the protector (A) located in the side part of the rear
seat cushion.
|
|
7. |
Remove the rear seat cushion cover (A) from the rear seat cushion
frame.
|
|
8. |
After removing the velcro tape (A) on the rear of seat cushion
and remove the rear seat cushion cover (B).
|
|
9. |
Install in the reverse order of removal.
|
• |
Replace any damaged clips.
|
|
|
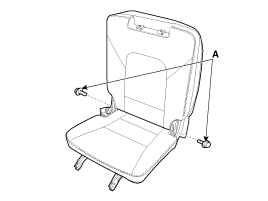
Component Location [Second row seat assembly] 1. Rear seat cushion cover [LH] 2. Rear seat cushion cover [RH] [Third row seat assembly] 1. Rear seat cushion cover [LH] 2. Rear seat cushion cover [RH] ...
Component Location [Second row seat assembly] 1. Rear seat latch [Third row seat assembly] 1. Rear seat latch ...
See also:
Components and Components Location
Component Location 1. Panorama sunroof 2. Panorama sunroof switch 3. Panorama sunroof motor & controller 4. Roller blind motor & slave controller ...
Front Wiper Motor. Repair
procedures
Removal 1. Loosen the windshield wiper arm nut after removing a wiper cap (A). 2. Remove the windshield wiper arm and blade (B) 3. If necessary, release the wiper blade fixing clip by pulling up and remove ...
Automatic transaxle
Depress the brake pedal and the lock release button when shifting. (If the shift lock system is not equipped, it is not necessary to depress the brake pedal. However, it is recommended to depress the ...
 Hyundai Santa Fe: Rear Seat Cushion Cover. Repair procedures
 Rear Seat Cushion Cover. Components and Components Location
 Rear Seat Latch. Components and Components Location