
 Hyundai Santa Fe: Speakers. Repair procedures
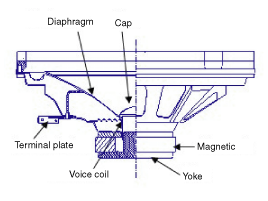
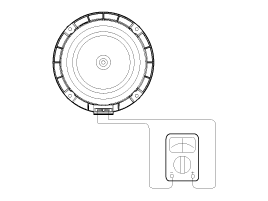
Inspection
| 1. |
Troubleshooting for Speaker
|


Removal
| 1. |
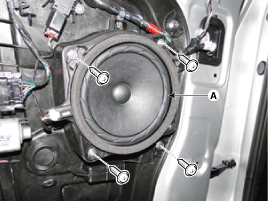
Remove the front door trim.
|
| 2. |
Remove the front speaker (A) after loosening the
screws (4EA).
|
| 1. |
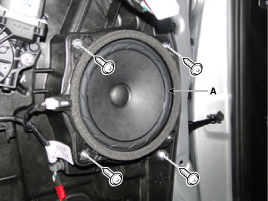
Remove the rear door trim.
|
| 2. |
Remove the rear speaker (A) after loosening the screws
(4EA).
|
| 1. |
Remove the front center speaker grill (A).
|
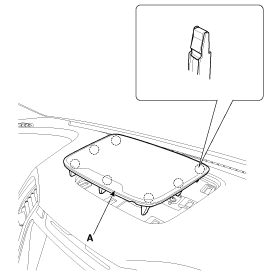
| 2. |
Remove the front center speaker (A) after loosening
the mounting screws (2EA).
|
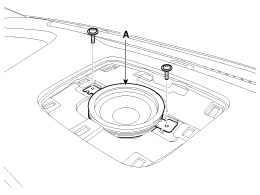
| 3. |
Remove the front center speaker (B) after disconnecting
the connector (A).
|
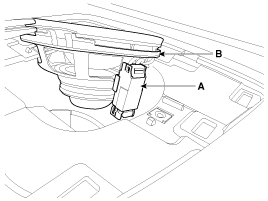
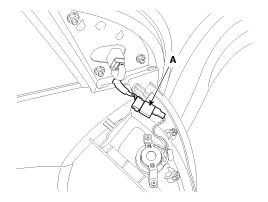
| 1. |
Using a screwdriver or remover, remove the front
door quadrant inner cover (A).
|
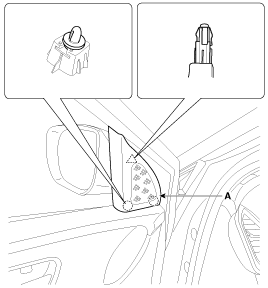
| 2. |
Disconnect the tweeter speaker connector (A).
|
| 1. |
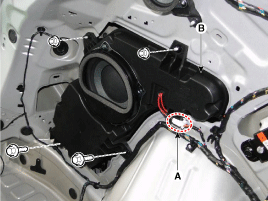
Remove the left luggage side trim.
|
| 2. |
Disconnect the woofer speaker connector (A).
|
| 3. |
Remove the woofer speaker (B) after loosening the
mounting nuts (2EA) and bolts (2EA).
|
| 1. |
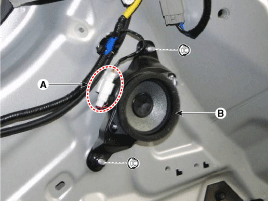
Remove the luggage side trim.
|
| 2. |
Disconnect the surrond speaker connector (A).
|
| 3. |
Remove the woofer speaker (B) after loosening the
mounting nuts (2EA).
|
Installation
| 1. |
Install the front speaker.
|
| 2. |
Install the front door trim.
|
| 1. |
Install the rear speaker.
|
| 2. |
Install the rear door trim.
|
| 1. |
Install the front center speaker.
|
| 2. |
Install the front center speaker grill.
|
| 1. |
Connect the connector.
|
| 2. |
Install the tweeter speaker and front door quadrant
inner cover
|
| 1. |
Install the woofer speaker.
|
| 2. |
Install the left luggage side trim.
|
| 1. |
Install the surround speaker.
|
| 2. |
Install the luggage side trim.
|
 Multimedia Jack. Repair procedures
Removal 1. Disconnect the negative (-) battery terminal. 2. Remove the console front complete assembly (A). 3. Remove the multimedia jack (B) after disconnecting the connector (A) from the console front ...
 External Amplifier. Components and Components
Location
External Amplifier. Components and Components
Location
Components Connector Pin Information No. Connector A (26 pin) Connector B (16 pin) Connector C (12 pin) 1 Battery + Right surround speaker + Rear right door + 2 Battery + Left surround speaker + Rear left ...
See also:
Tire Pressure Monitoring System (TPMS)
(1) TPMS malfunction indicator (2) Low tire pressure indicator (Shown on the LCD display) Each tire, including the spare (if provided), should be checked monthly when cold and inflated to the recommended ...
Dynamic Damper. Components and Components Location
Components 1. BJ assembly 2. BJ circlip 3. BJ boot band 4. BJ boot 5. Dynamic damper band 6. Dynamic damper 7. Shaft 8. TJ boot band 9. TJ boot 10. Spider assembly 11. Retainer ring 12. TJ housing 13. ...
TPMS Sensor. Description and Operation
Description 1. Function A. By detecting the pressure, temperature, acceleration, and battery condition, transmit information to ECU by a wireless RF. B. Wheel location is recognized by comparing with Wheel ...
